├── Box-Box
  ├── github
├── kellyshee.github.ioYou need the following:
Note
This website’s directory is kellyshee.github.io. The directory in the images is quarto_web_tutorial, which I deleted because I dislike underscores in URLs.
1 Create a R project
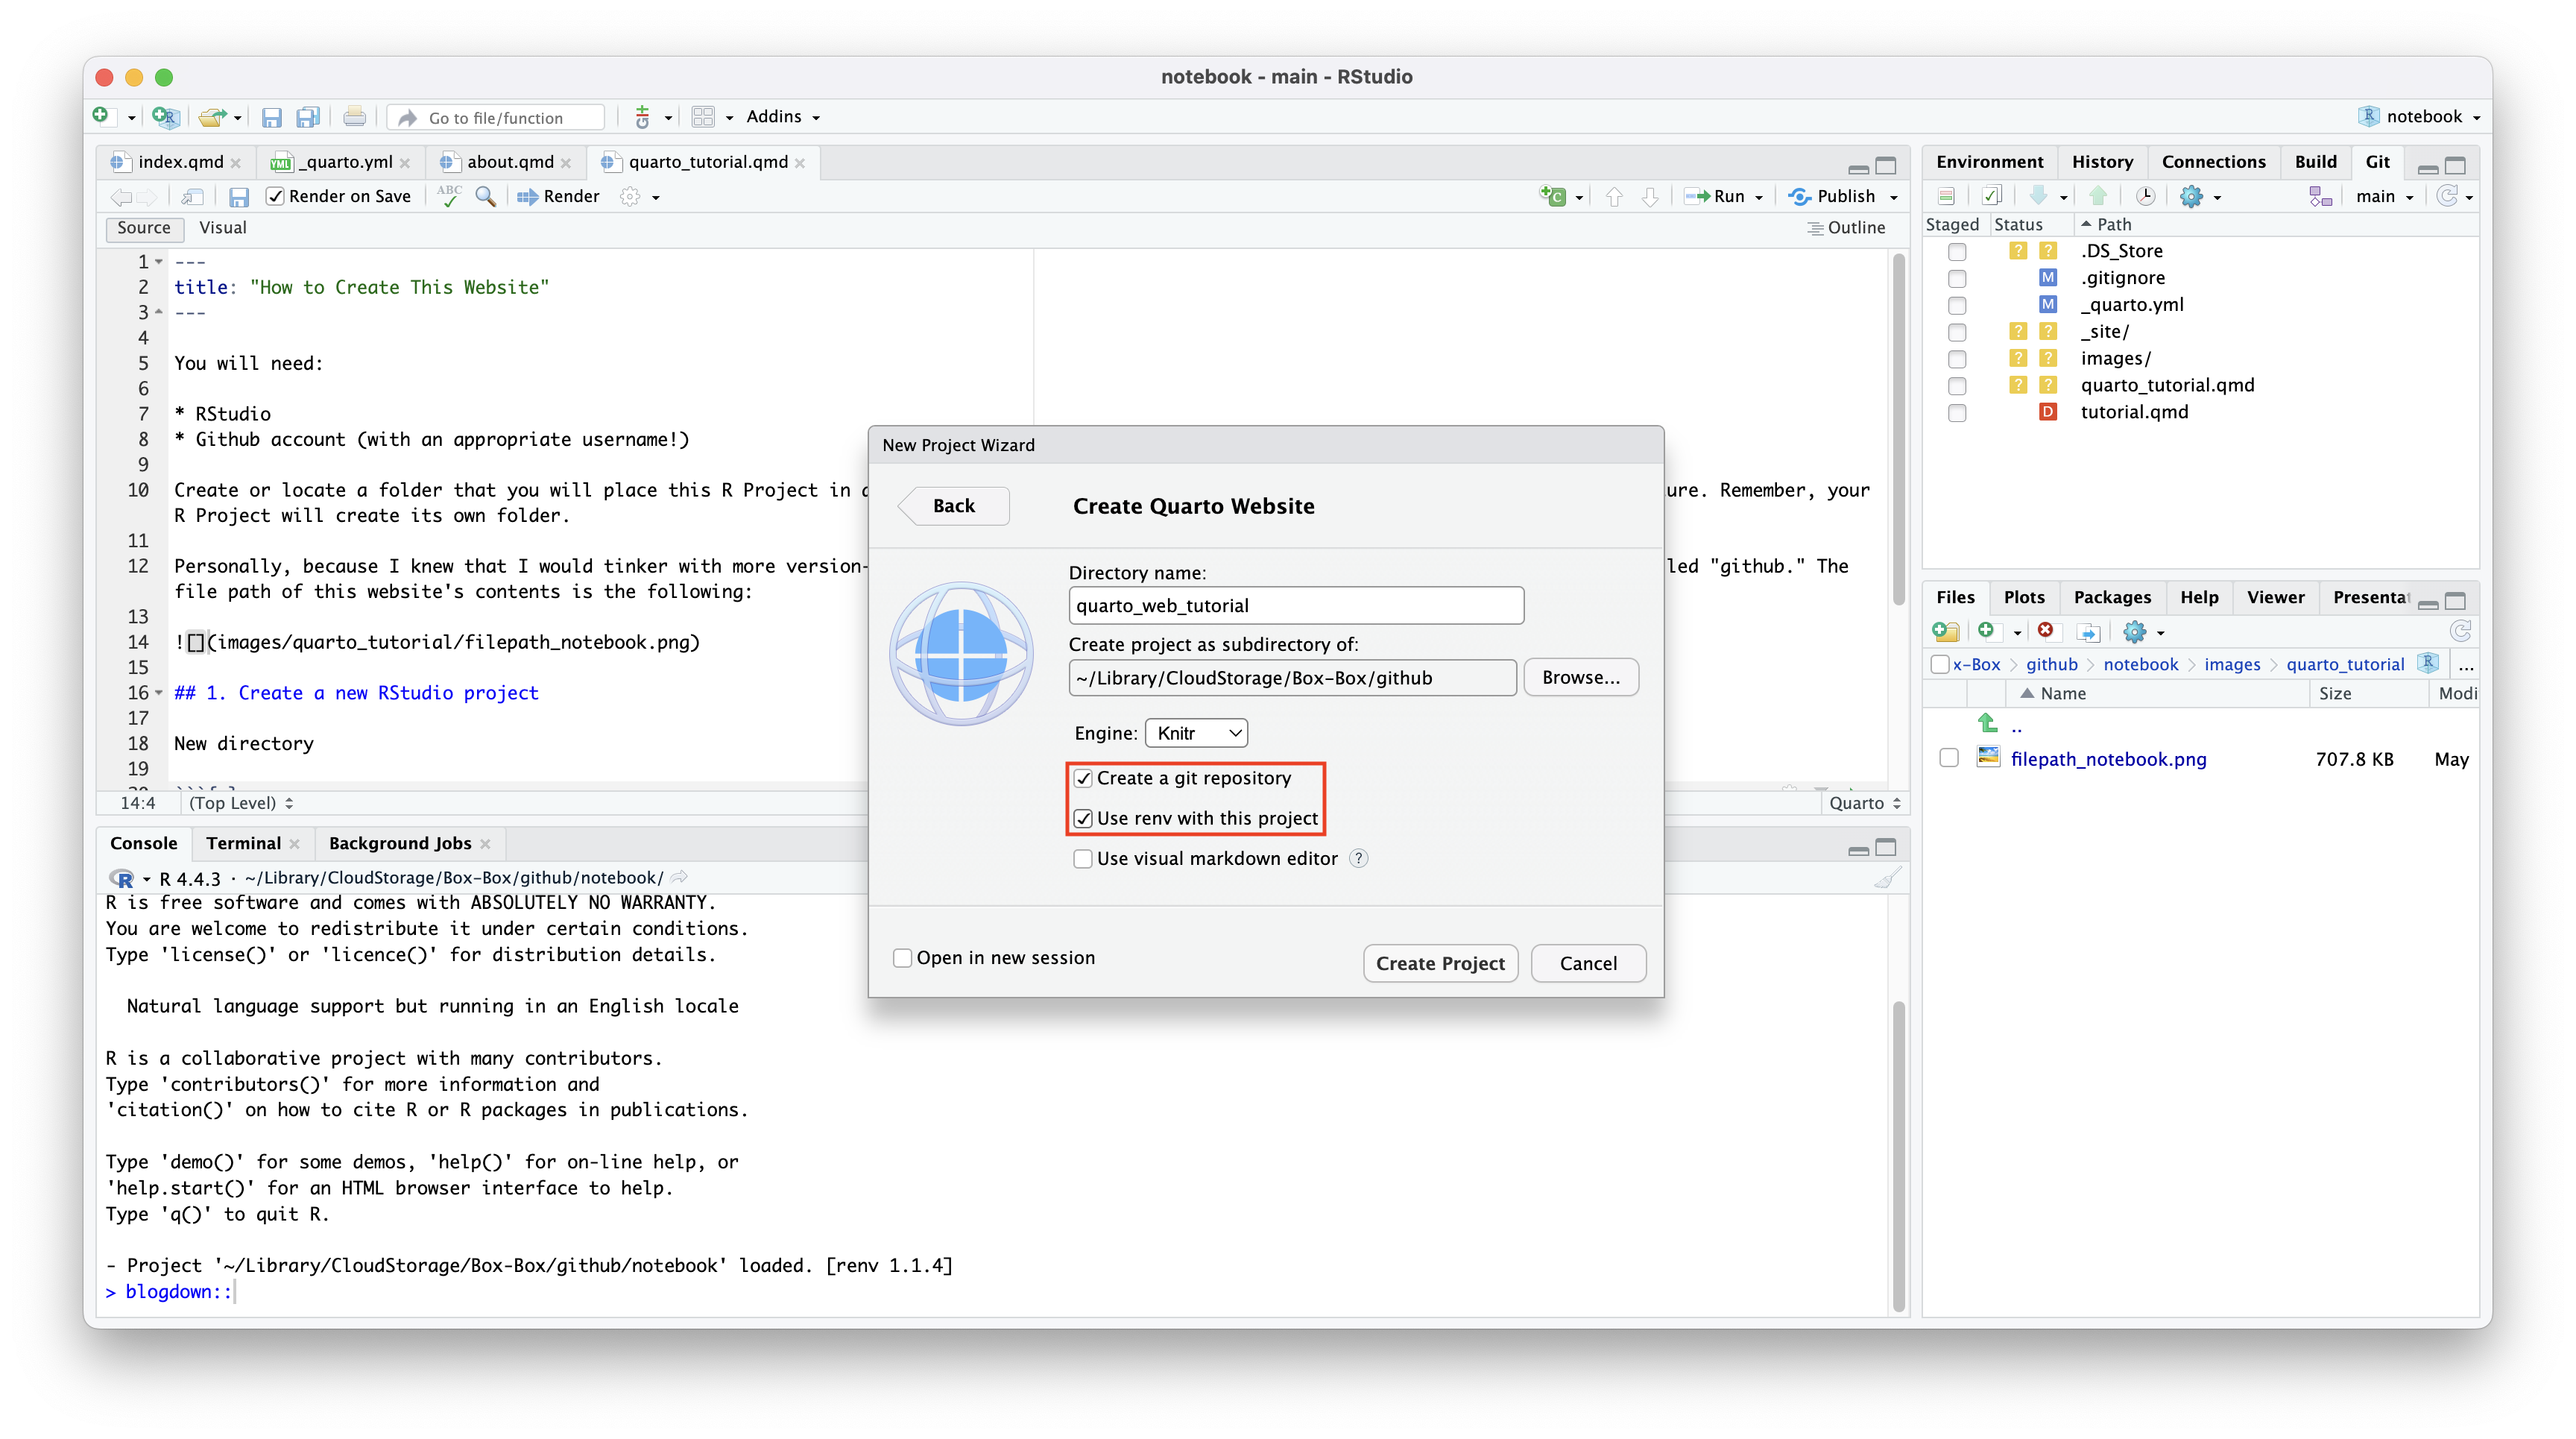
- Navigate to File > New Project > New Directory > Quarto Website.
- Directory name
- If this website is for . . .
- yourself:
your-github-username.github.io - class:
your-class-name
- yourself:
- If this website is for . . .
- Create project as subdirectory
- Where do you want to place this project? It should be somewhere easy to find, such as on your desktop.
- I’ll be creating more version-controlled projects, so I placed this directory (
kellyshee.github.io) inside a “github” folder, which is located inside my Box drive. Therefore, this directory’s file path is the following:
- Engine: Knitr
- Select Create a git repository
- Select Use renv with this project
2 Create a GitHub repo
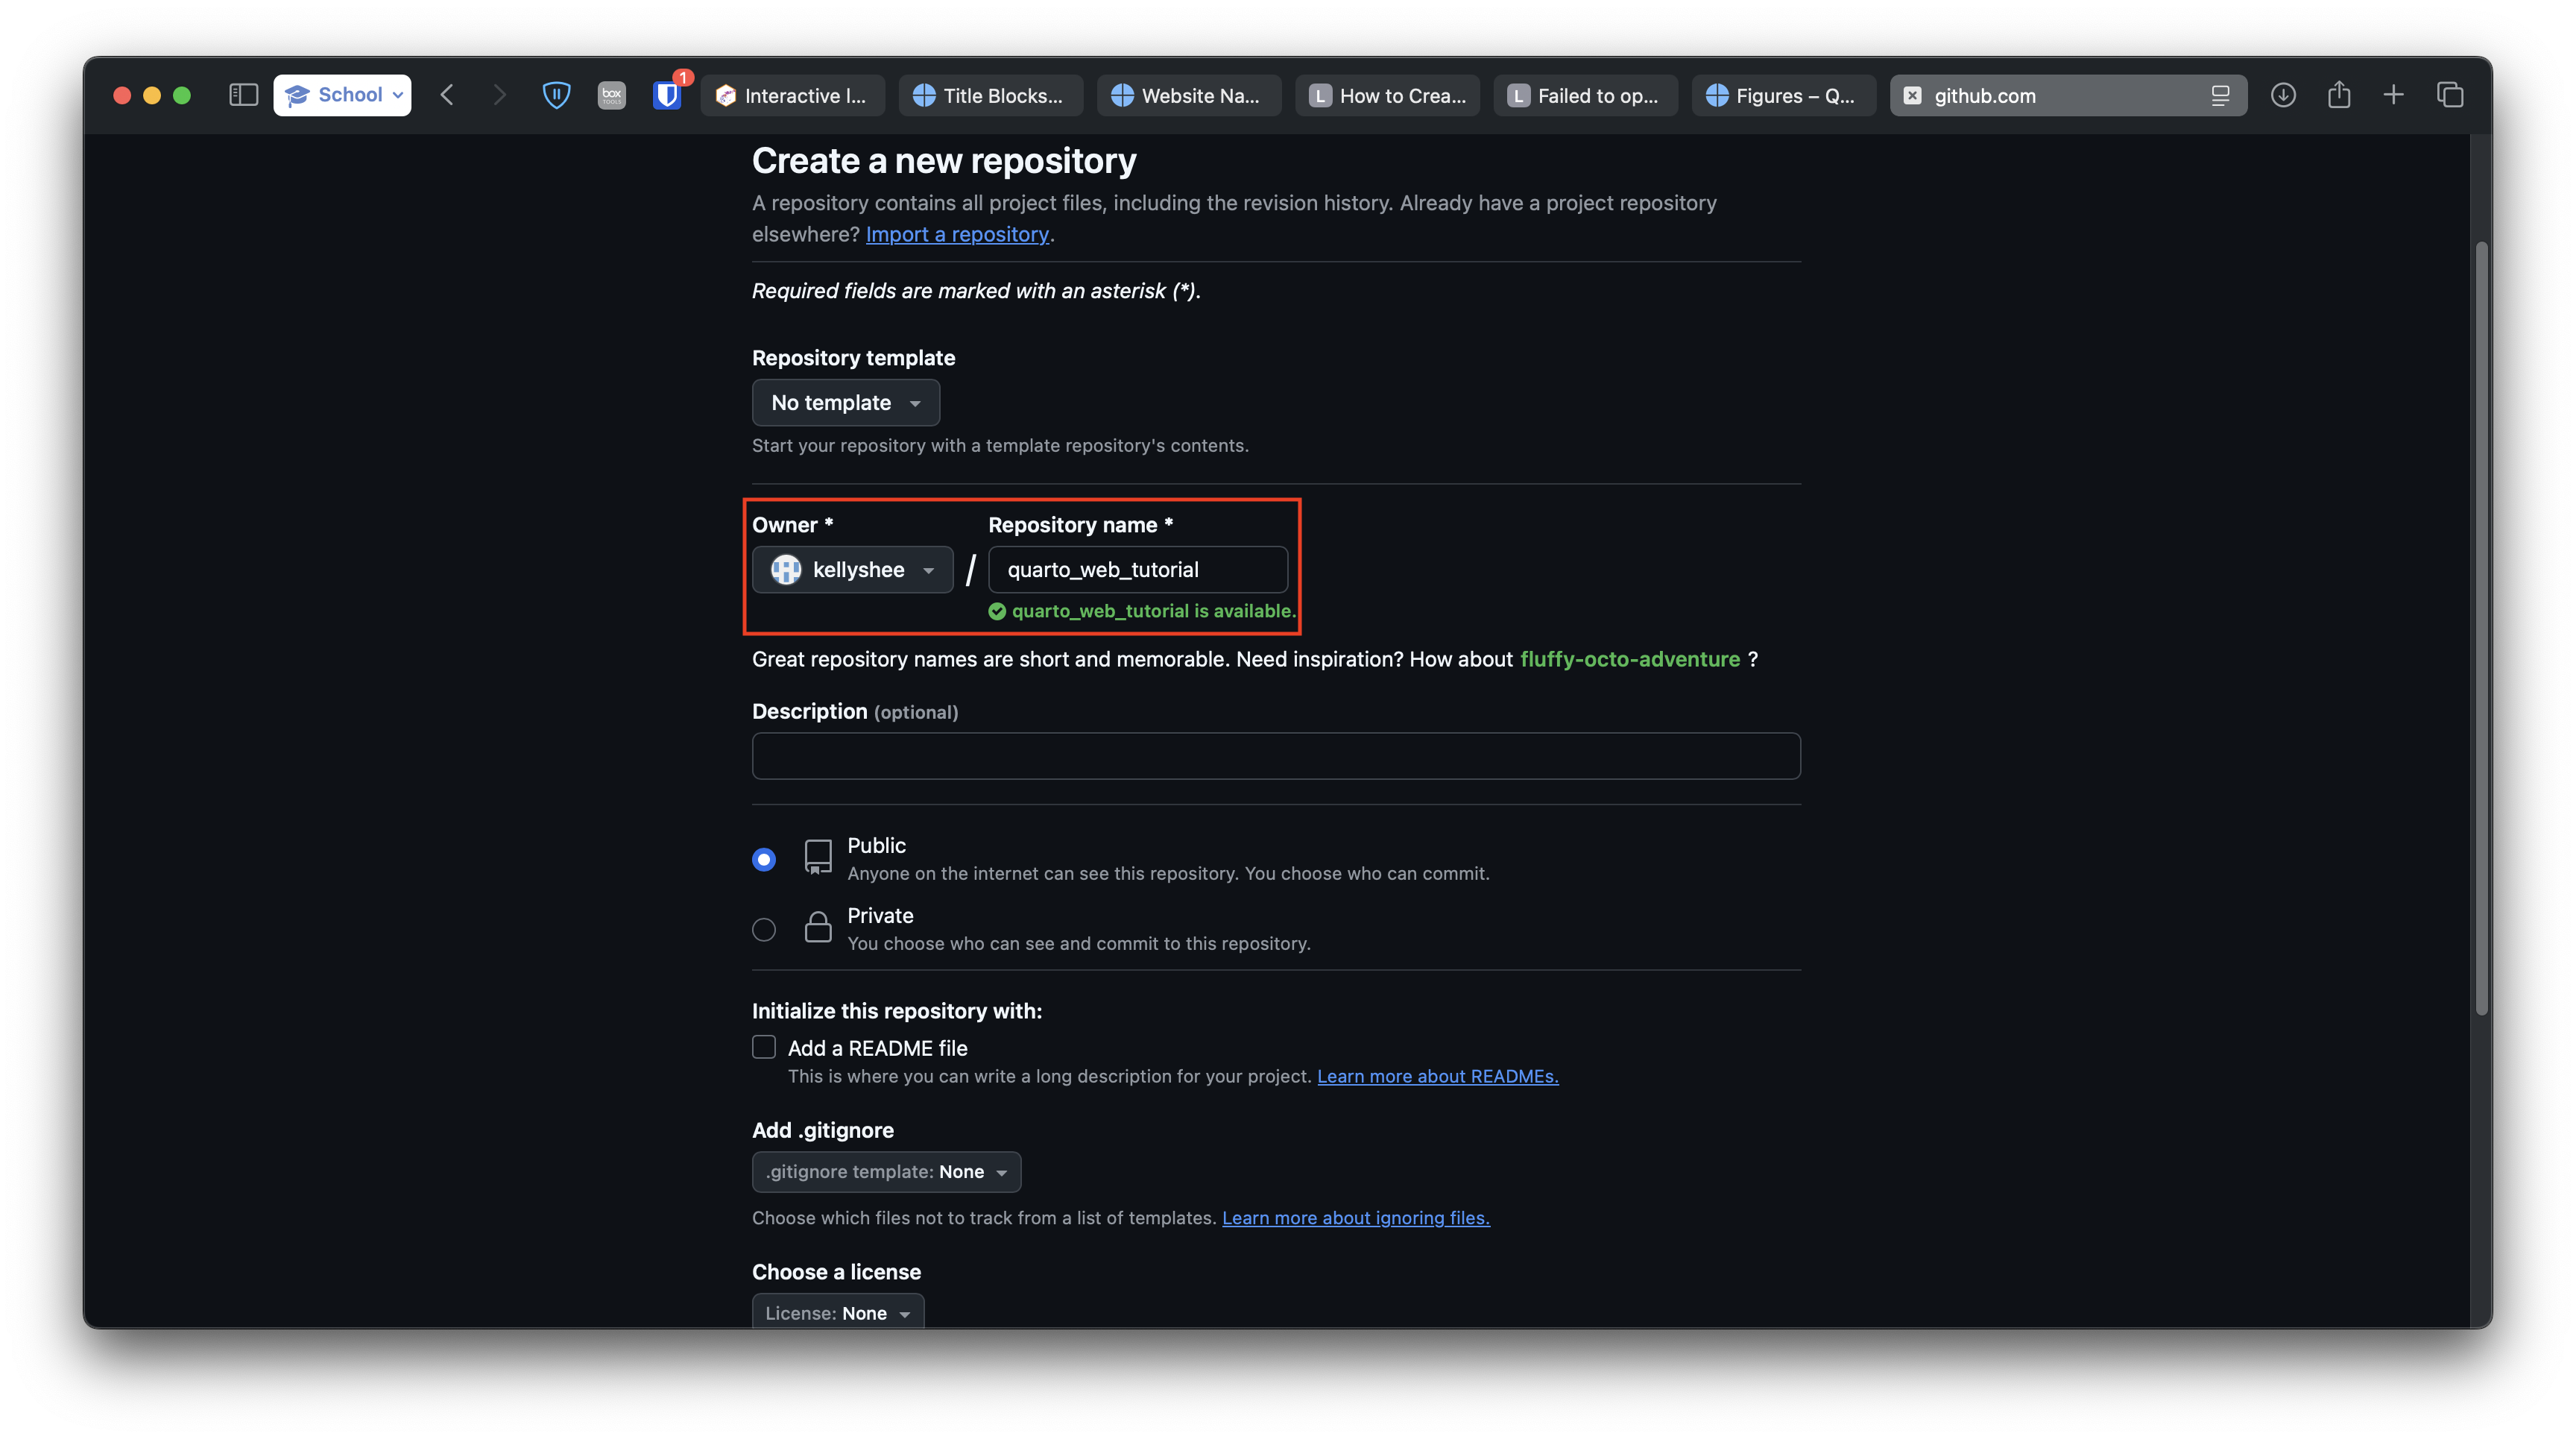
- Go to GitHub.
- Click the green “New” button next to “Top repositories” in the left column.
- Type your repository name, which must be the same as your directory name.
- Do not change anything else. Scroll down to create your repository.
3 Copy Git commands
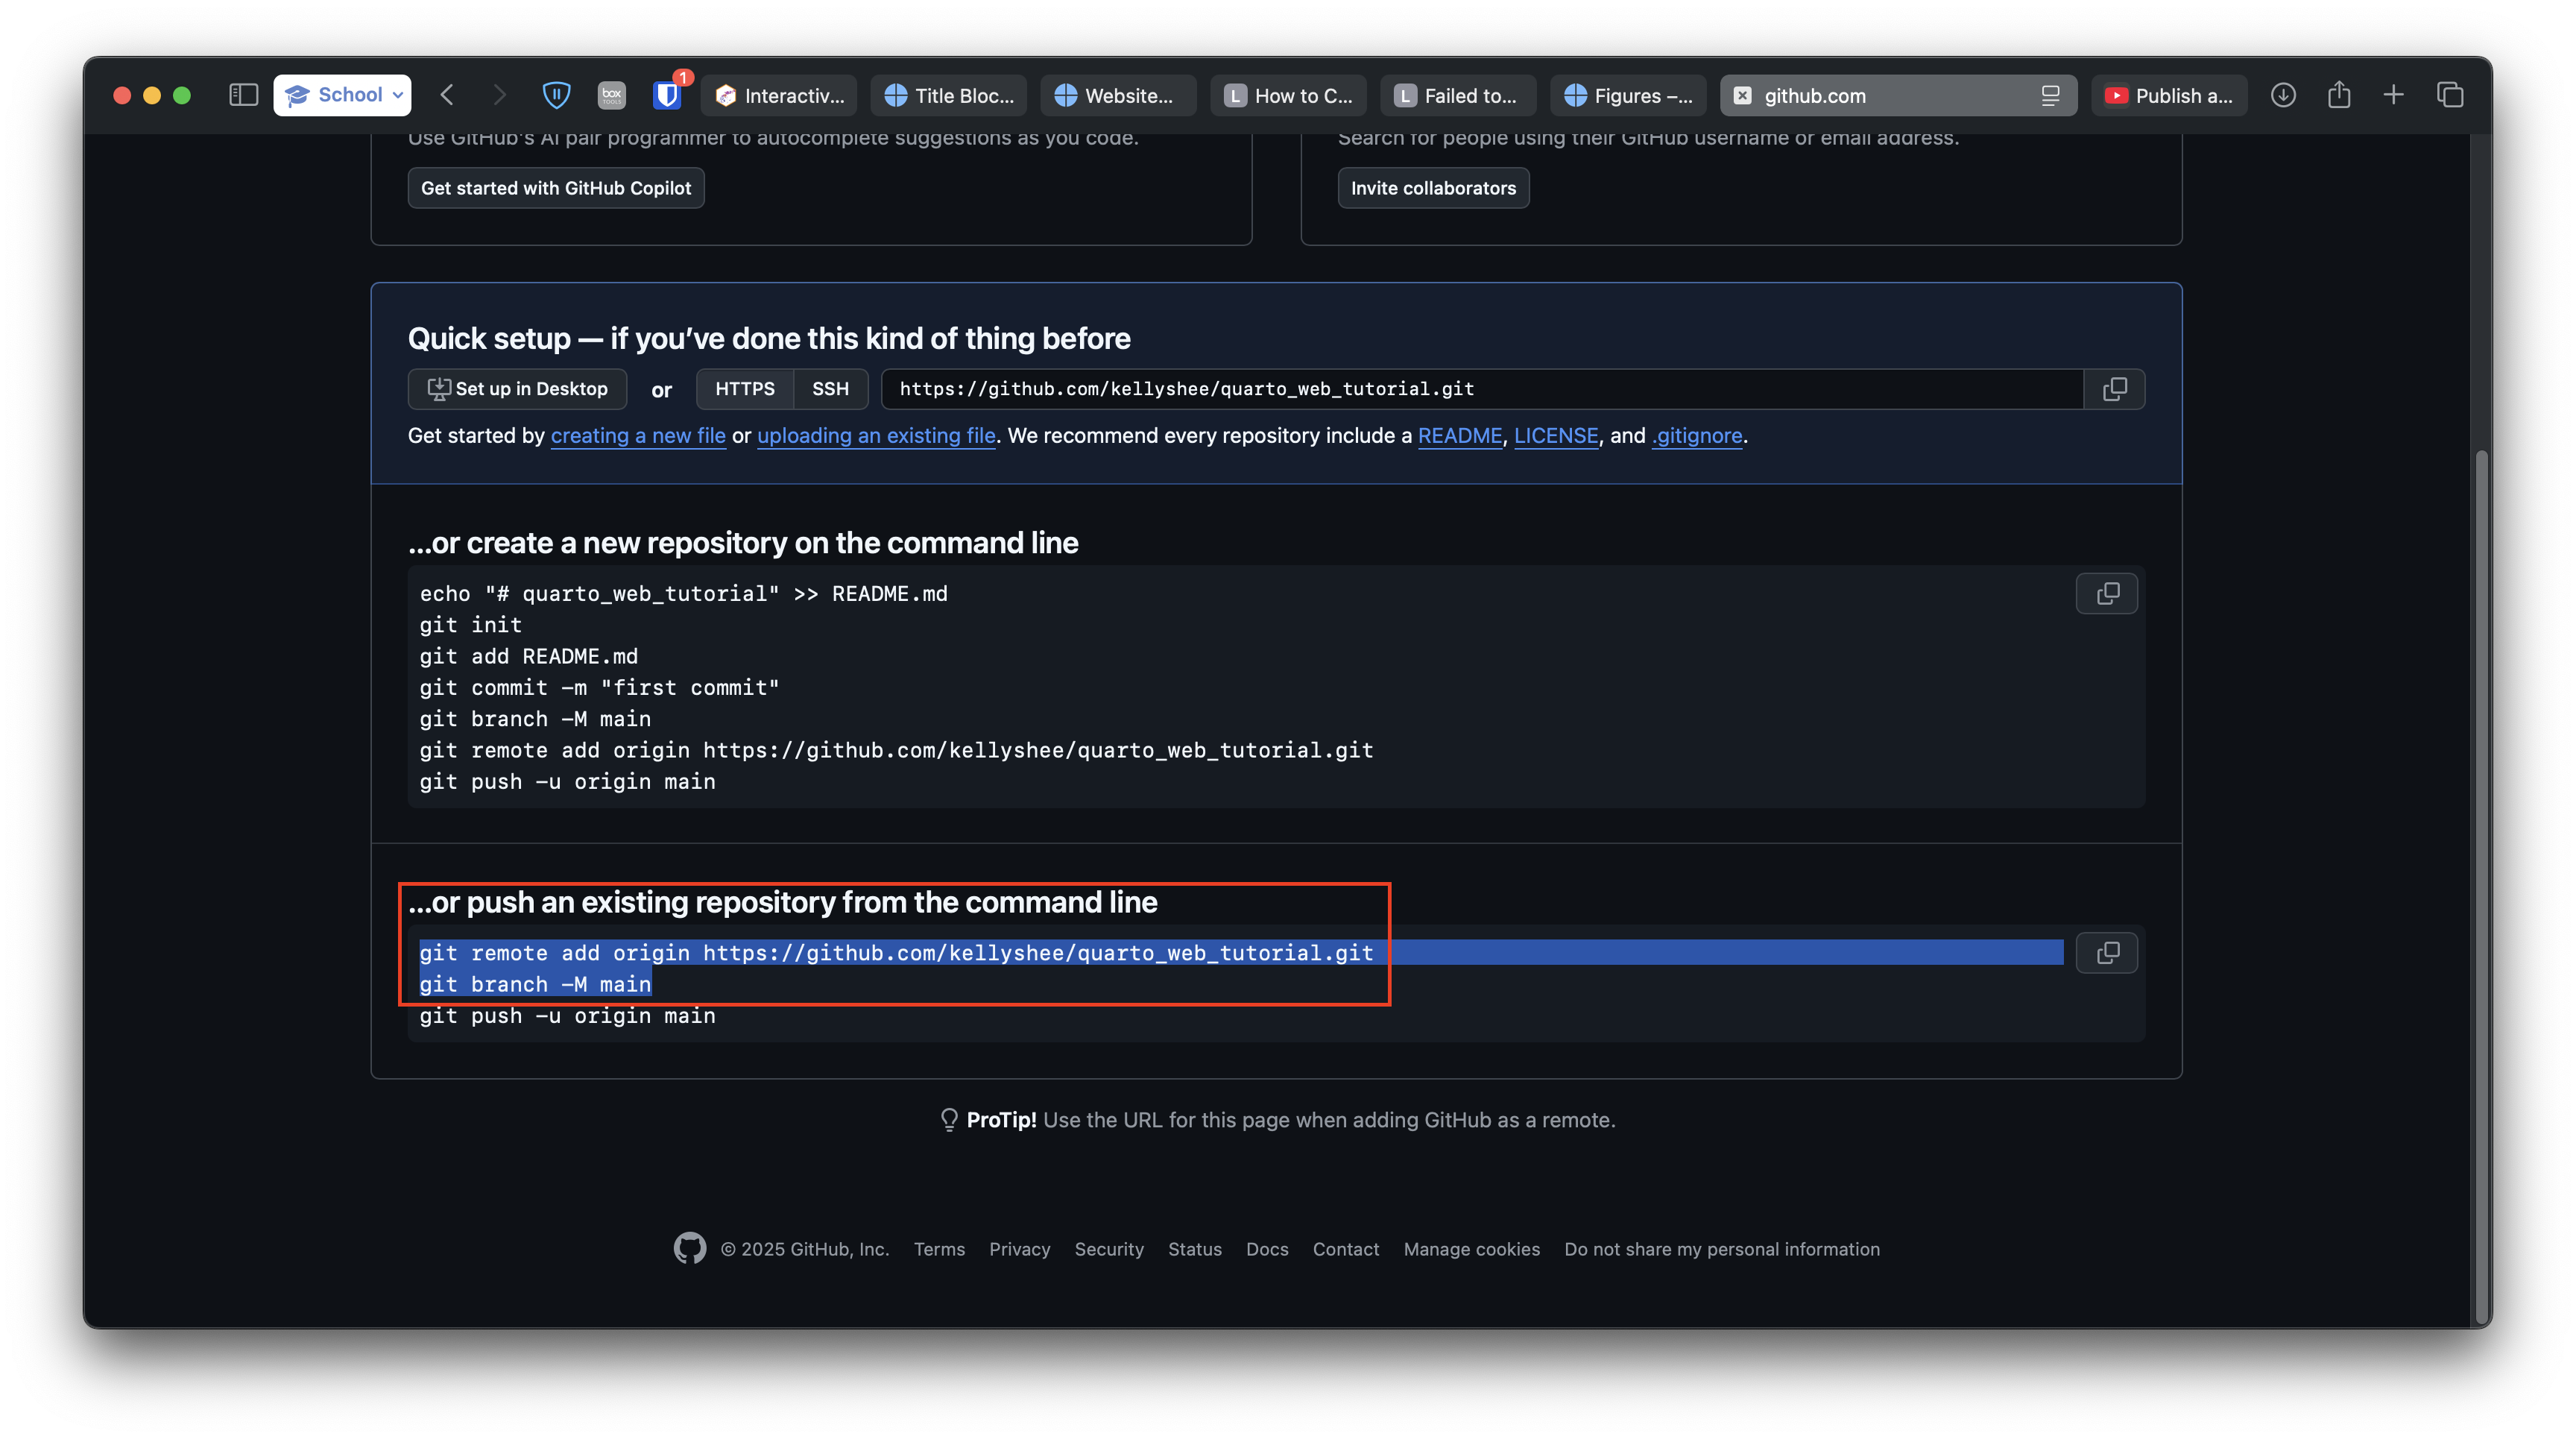
- Scroll to the section that says “. . . or push an existing repository from the command line.”
- Copy the first two lines.
- Return to RStudio.
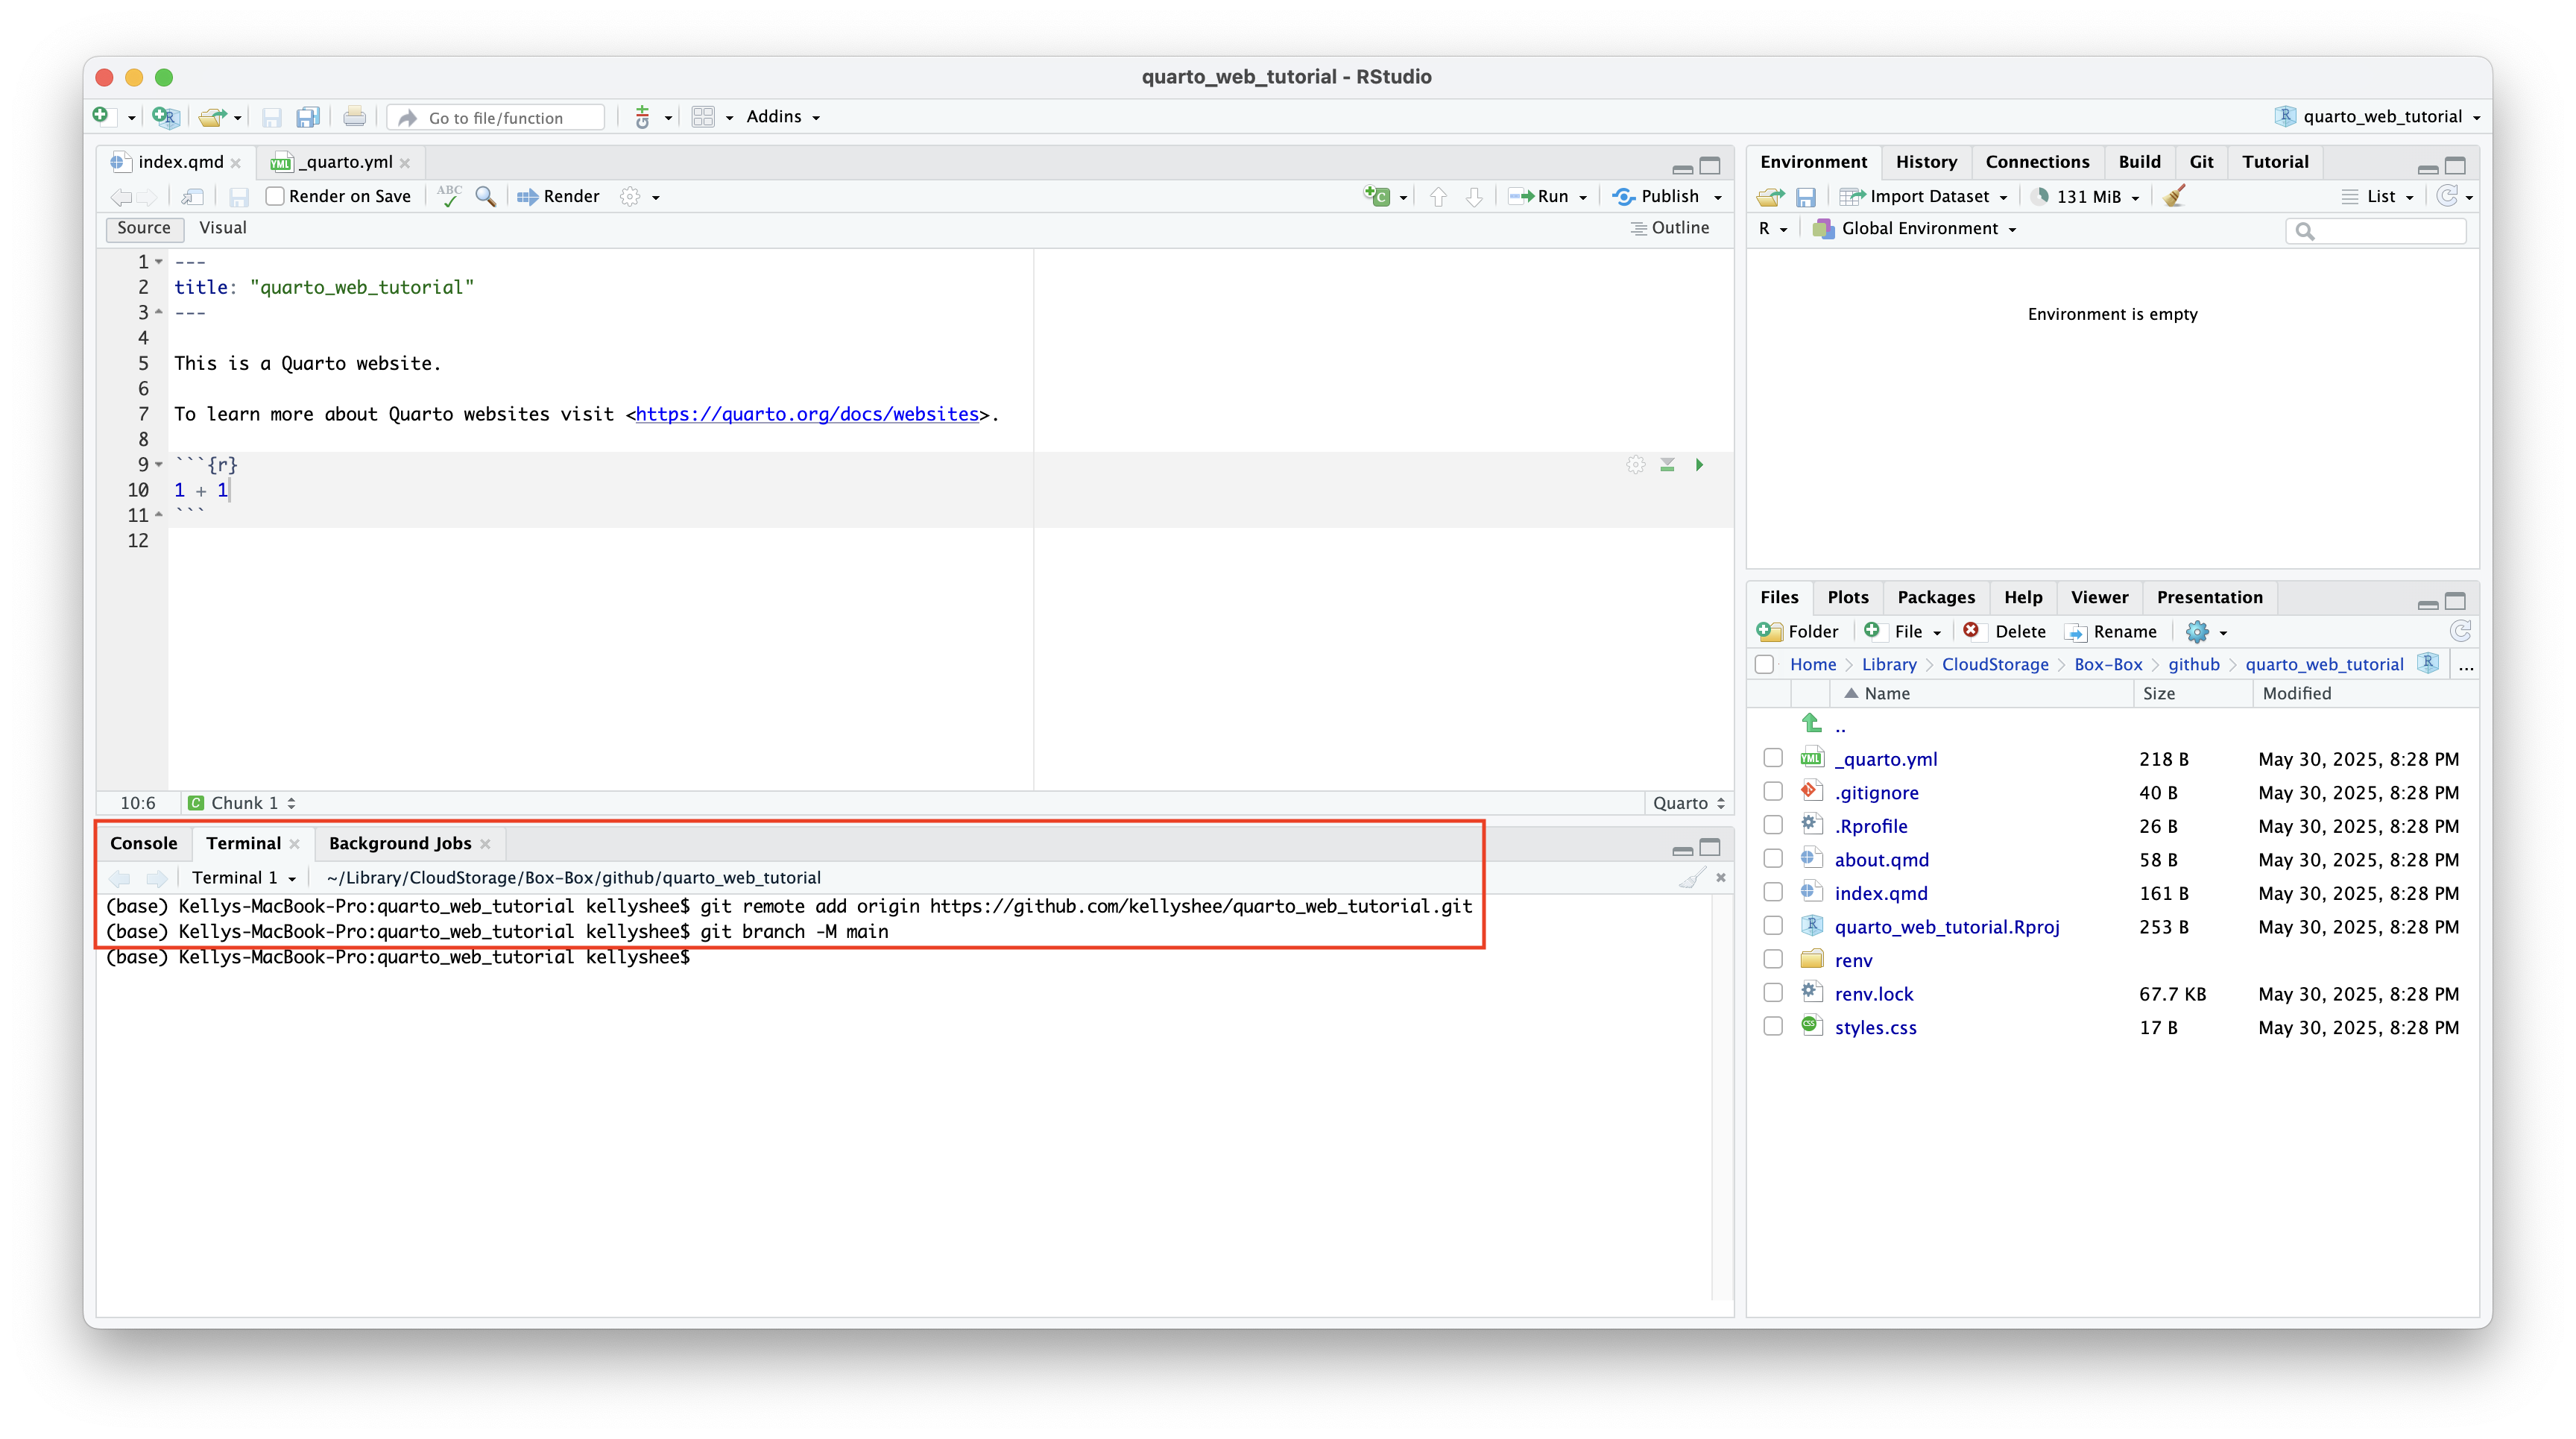
4 Paste Git commands into terminal
- Navigate to the console pane and switch to the terminal tab.
- Paste and enter the commands. The terminal will not return anything.
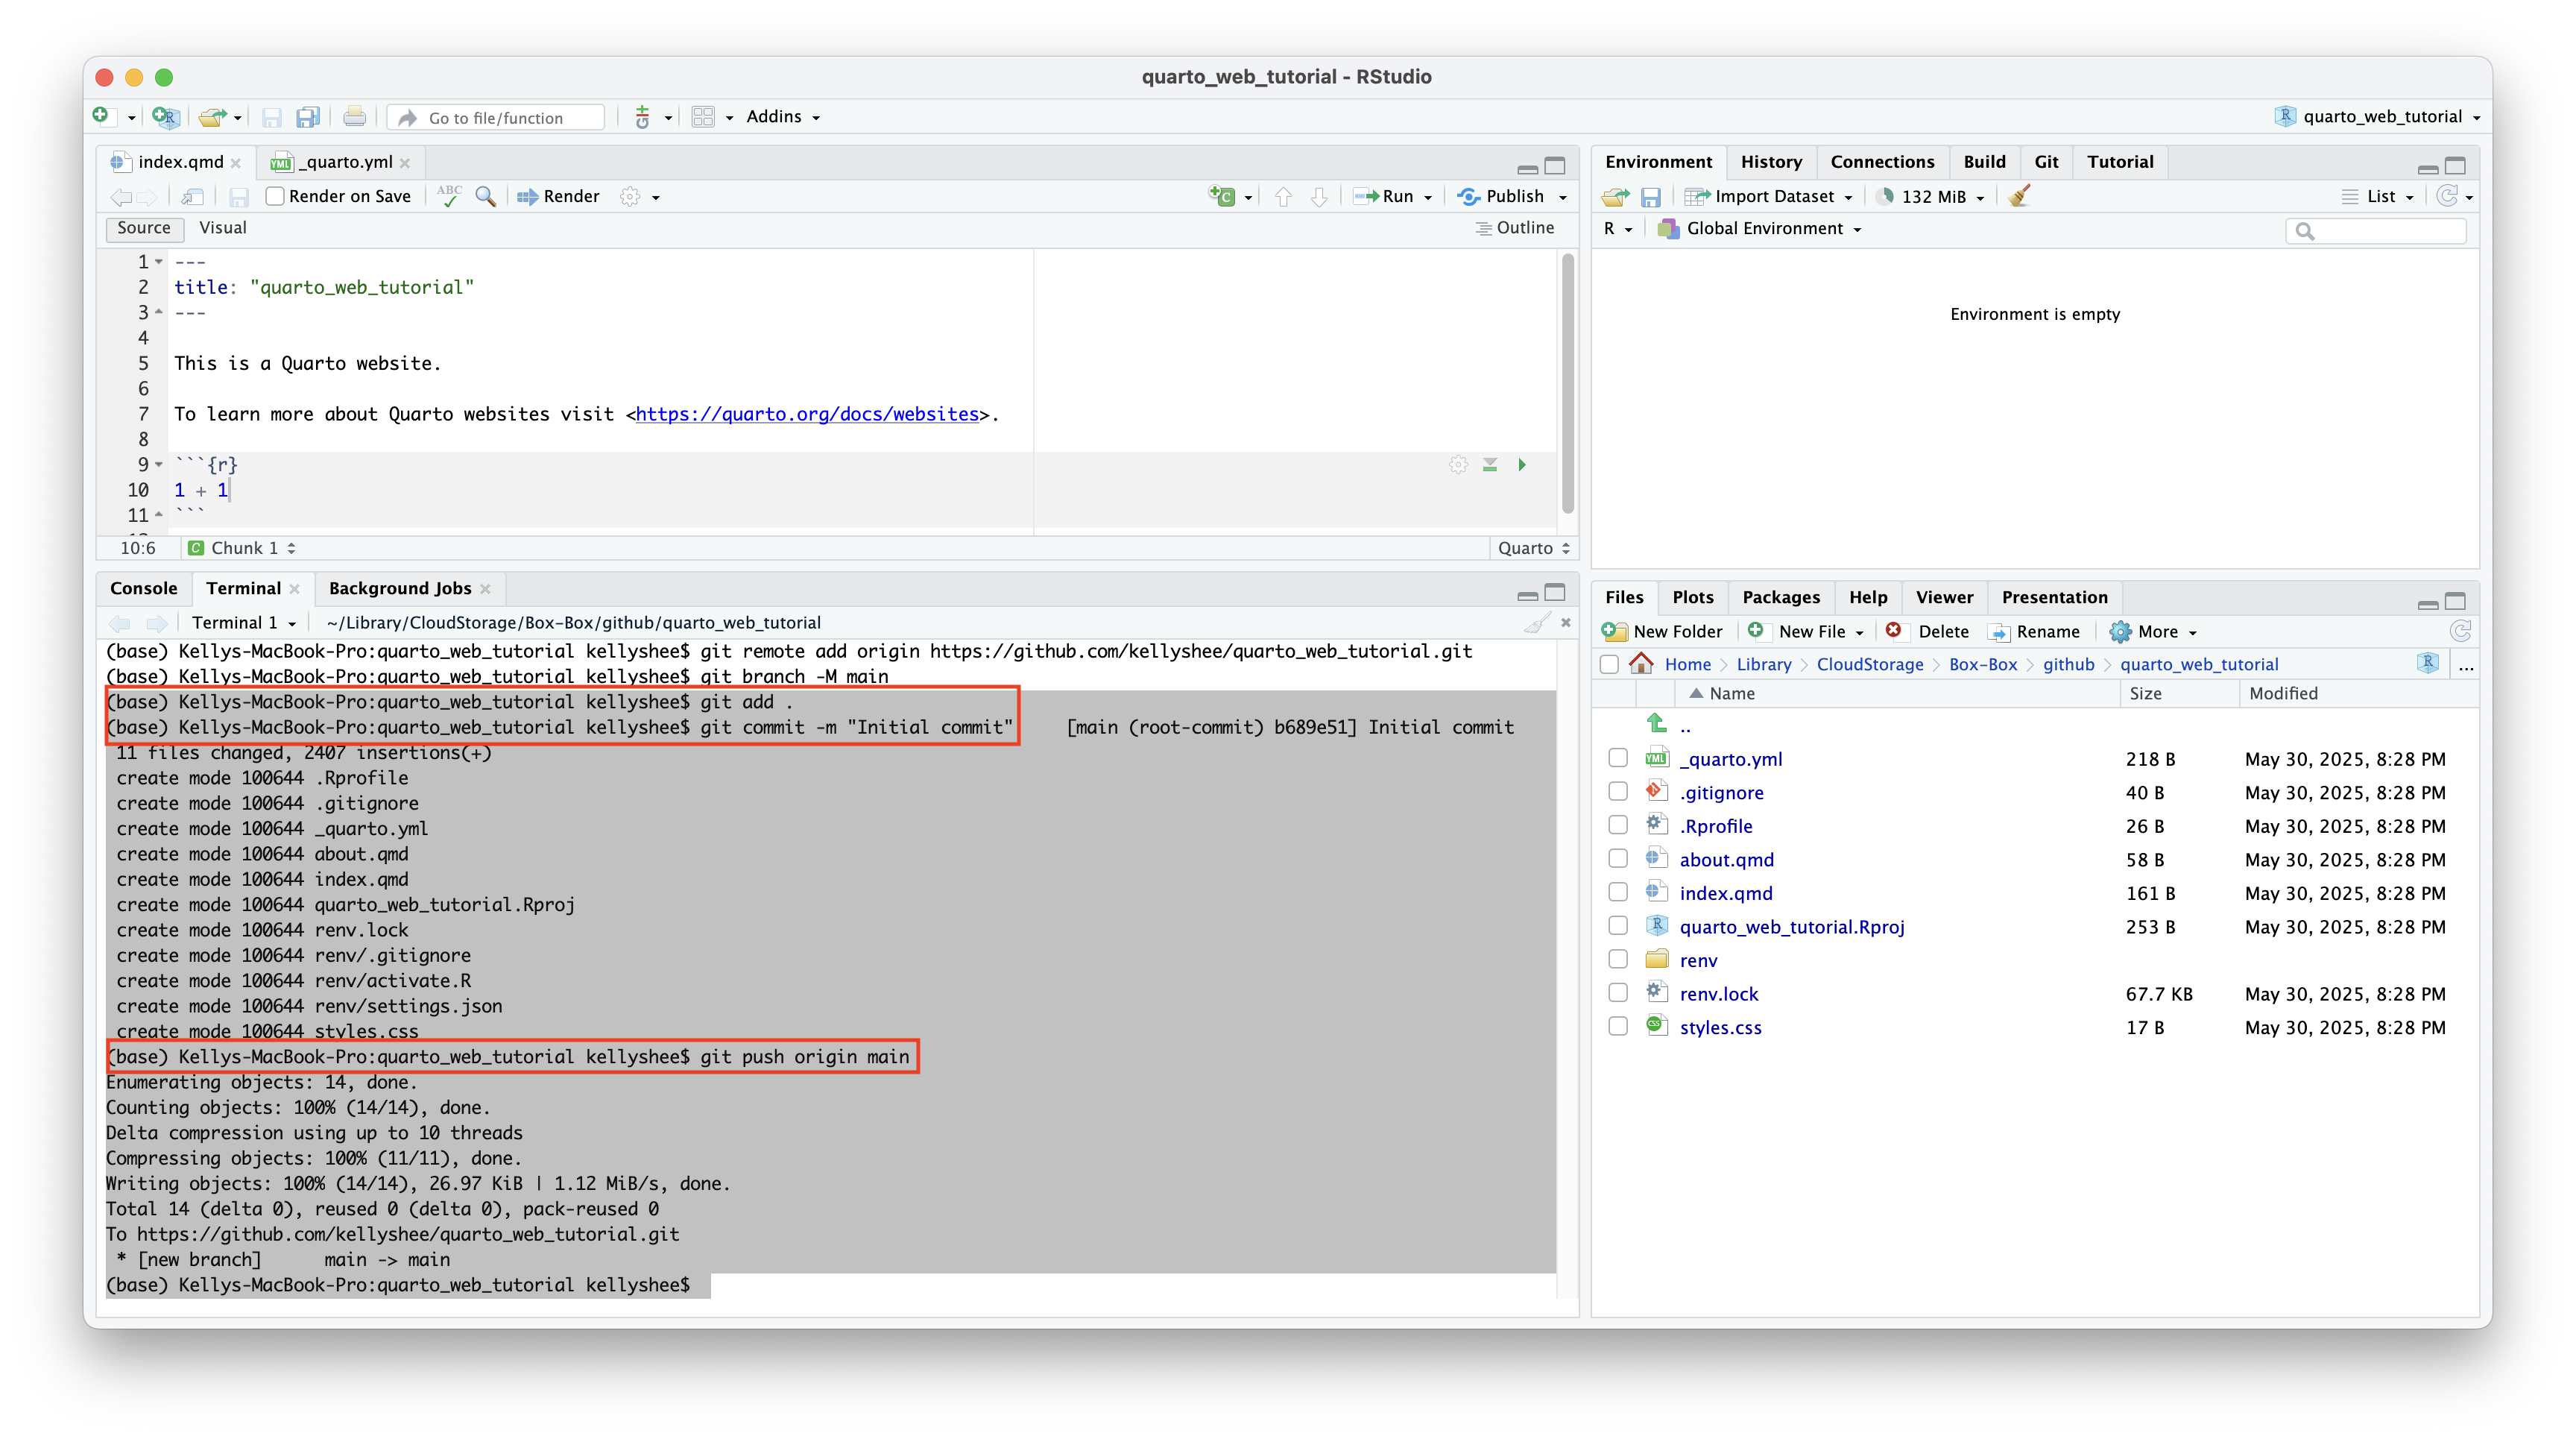
5 Push local files to repo
- Copy and paste the following commands one by one into the terminal. Output will apppear, indicating that files are being uploaded to your repository.
Terminal
git add .
git commit -m "Initial commit"
git push origin main- Return to your GitHub repository and refresh the page. Your project’s files should appear there.
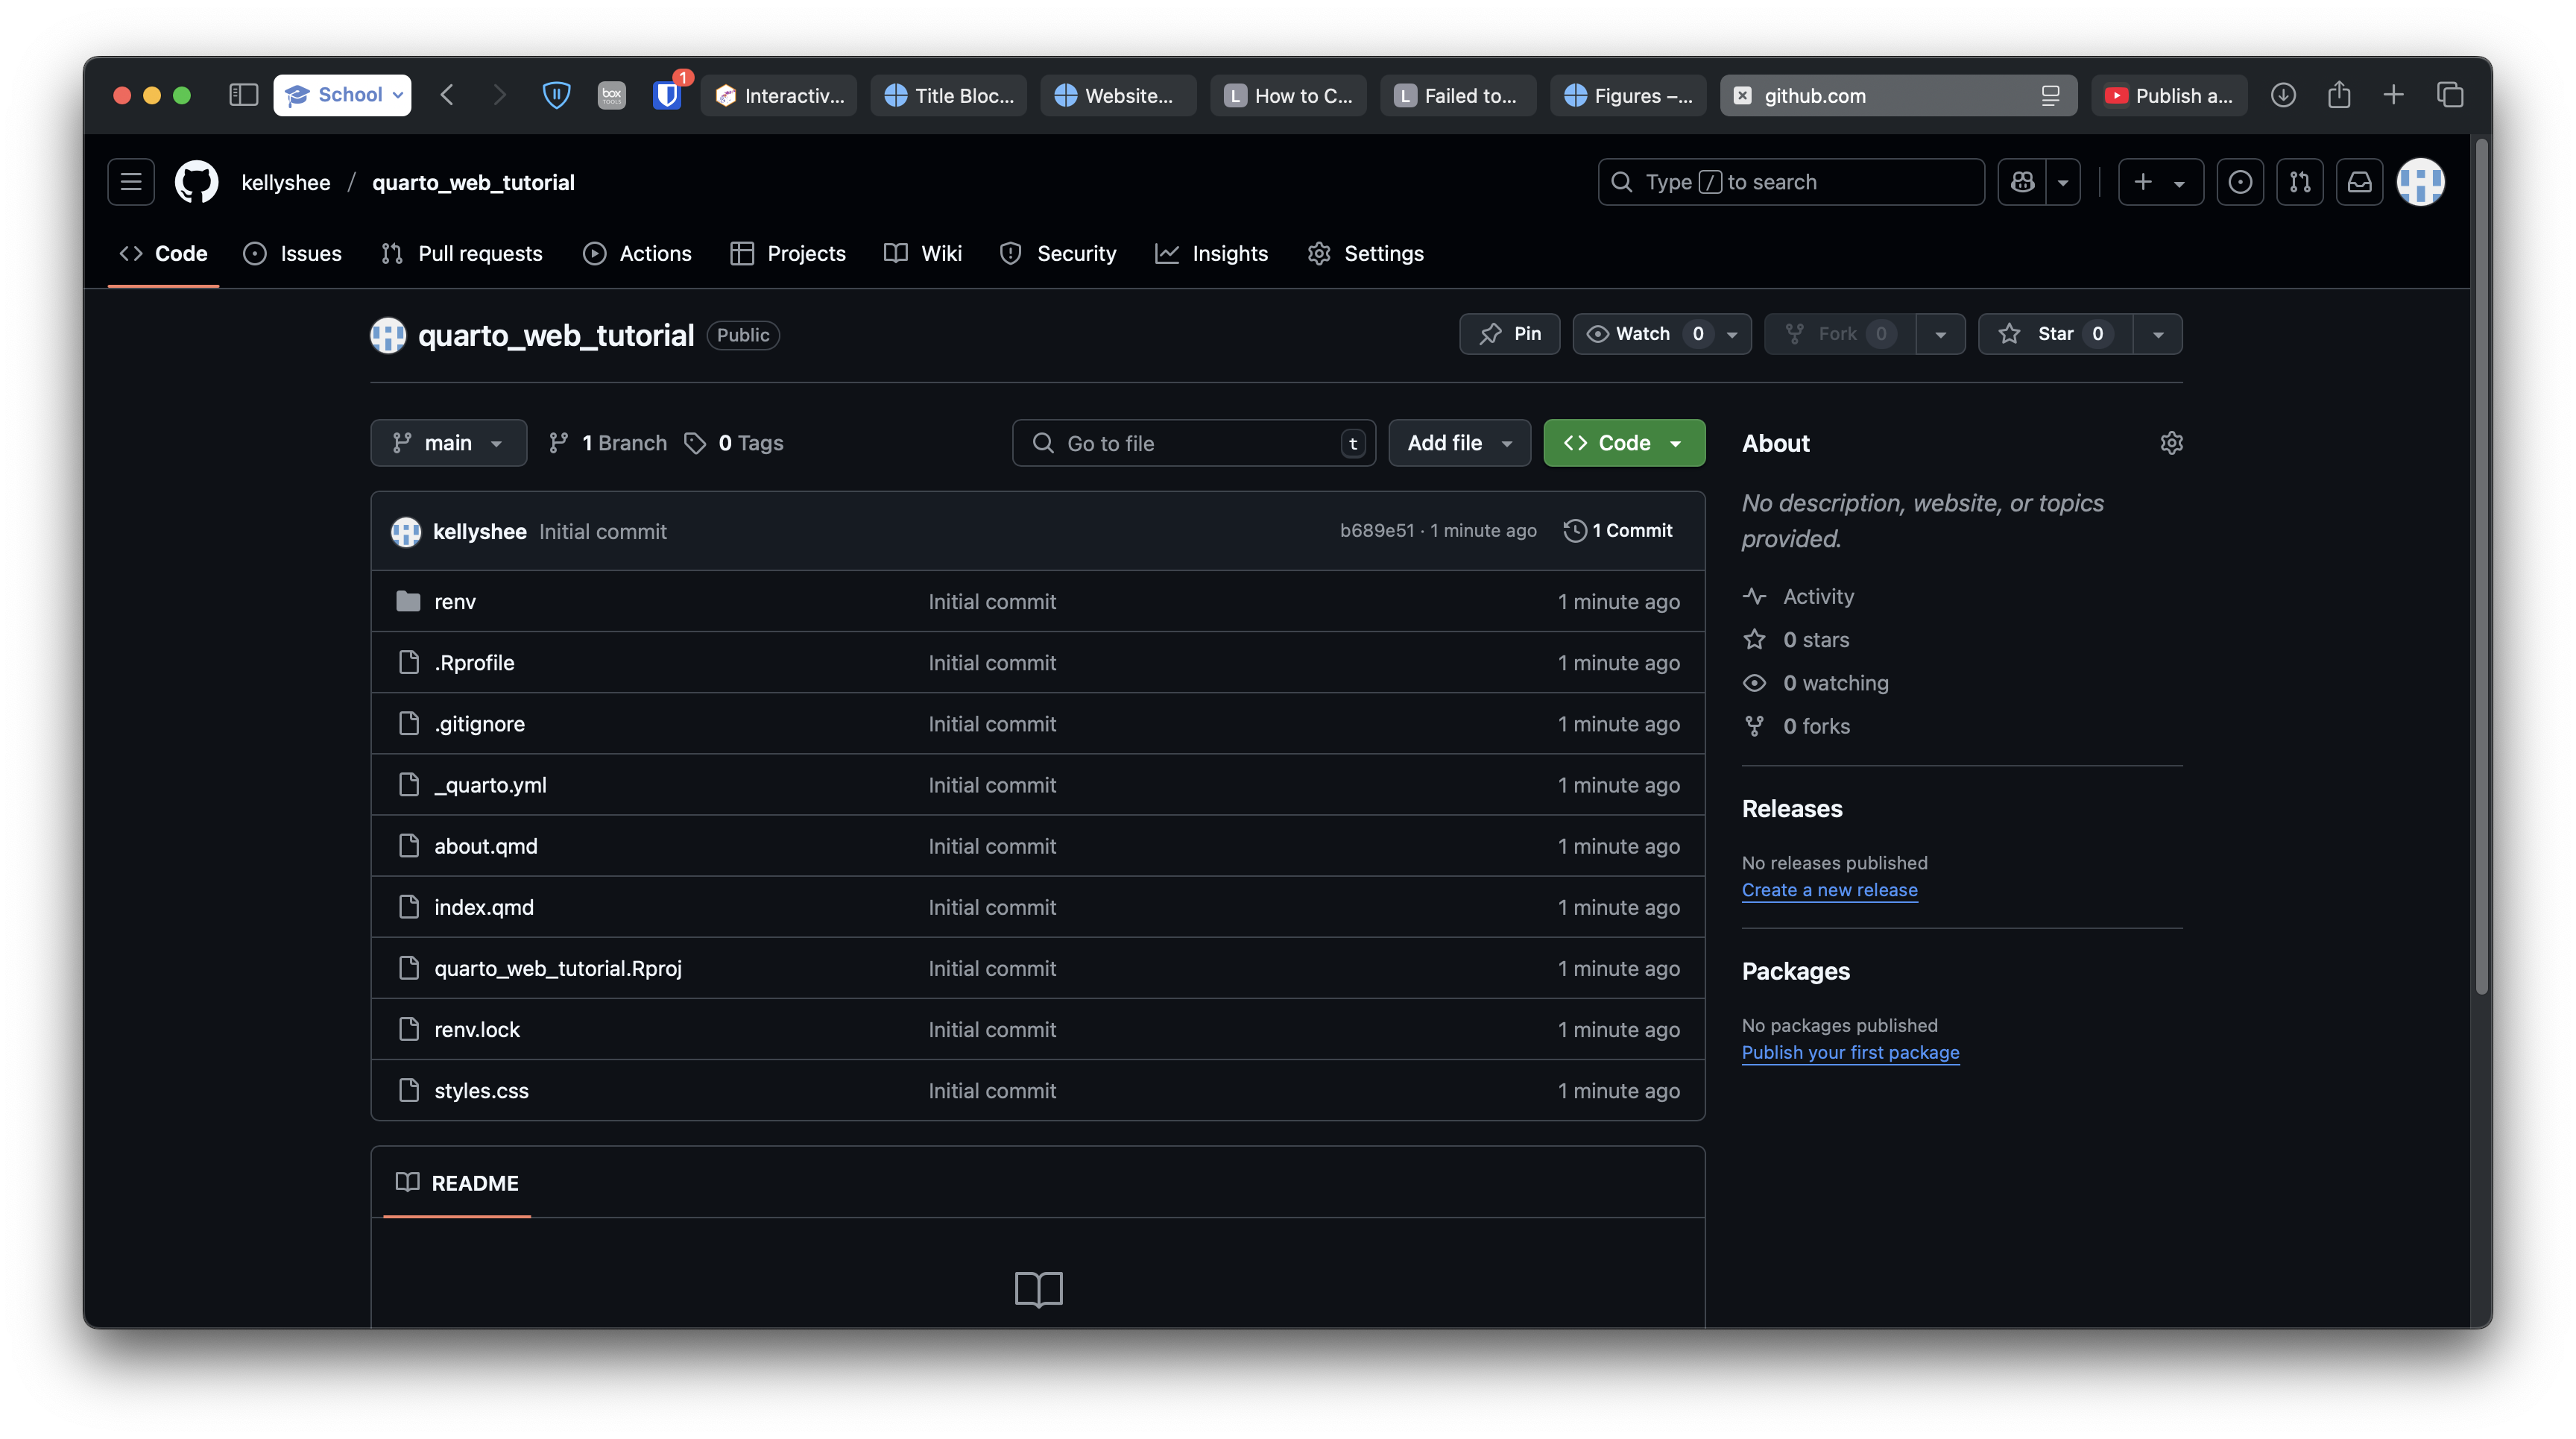
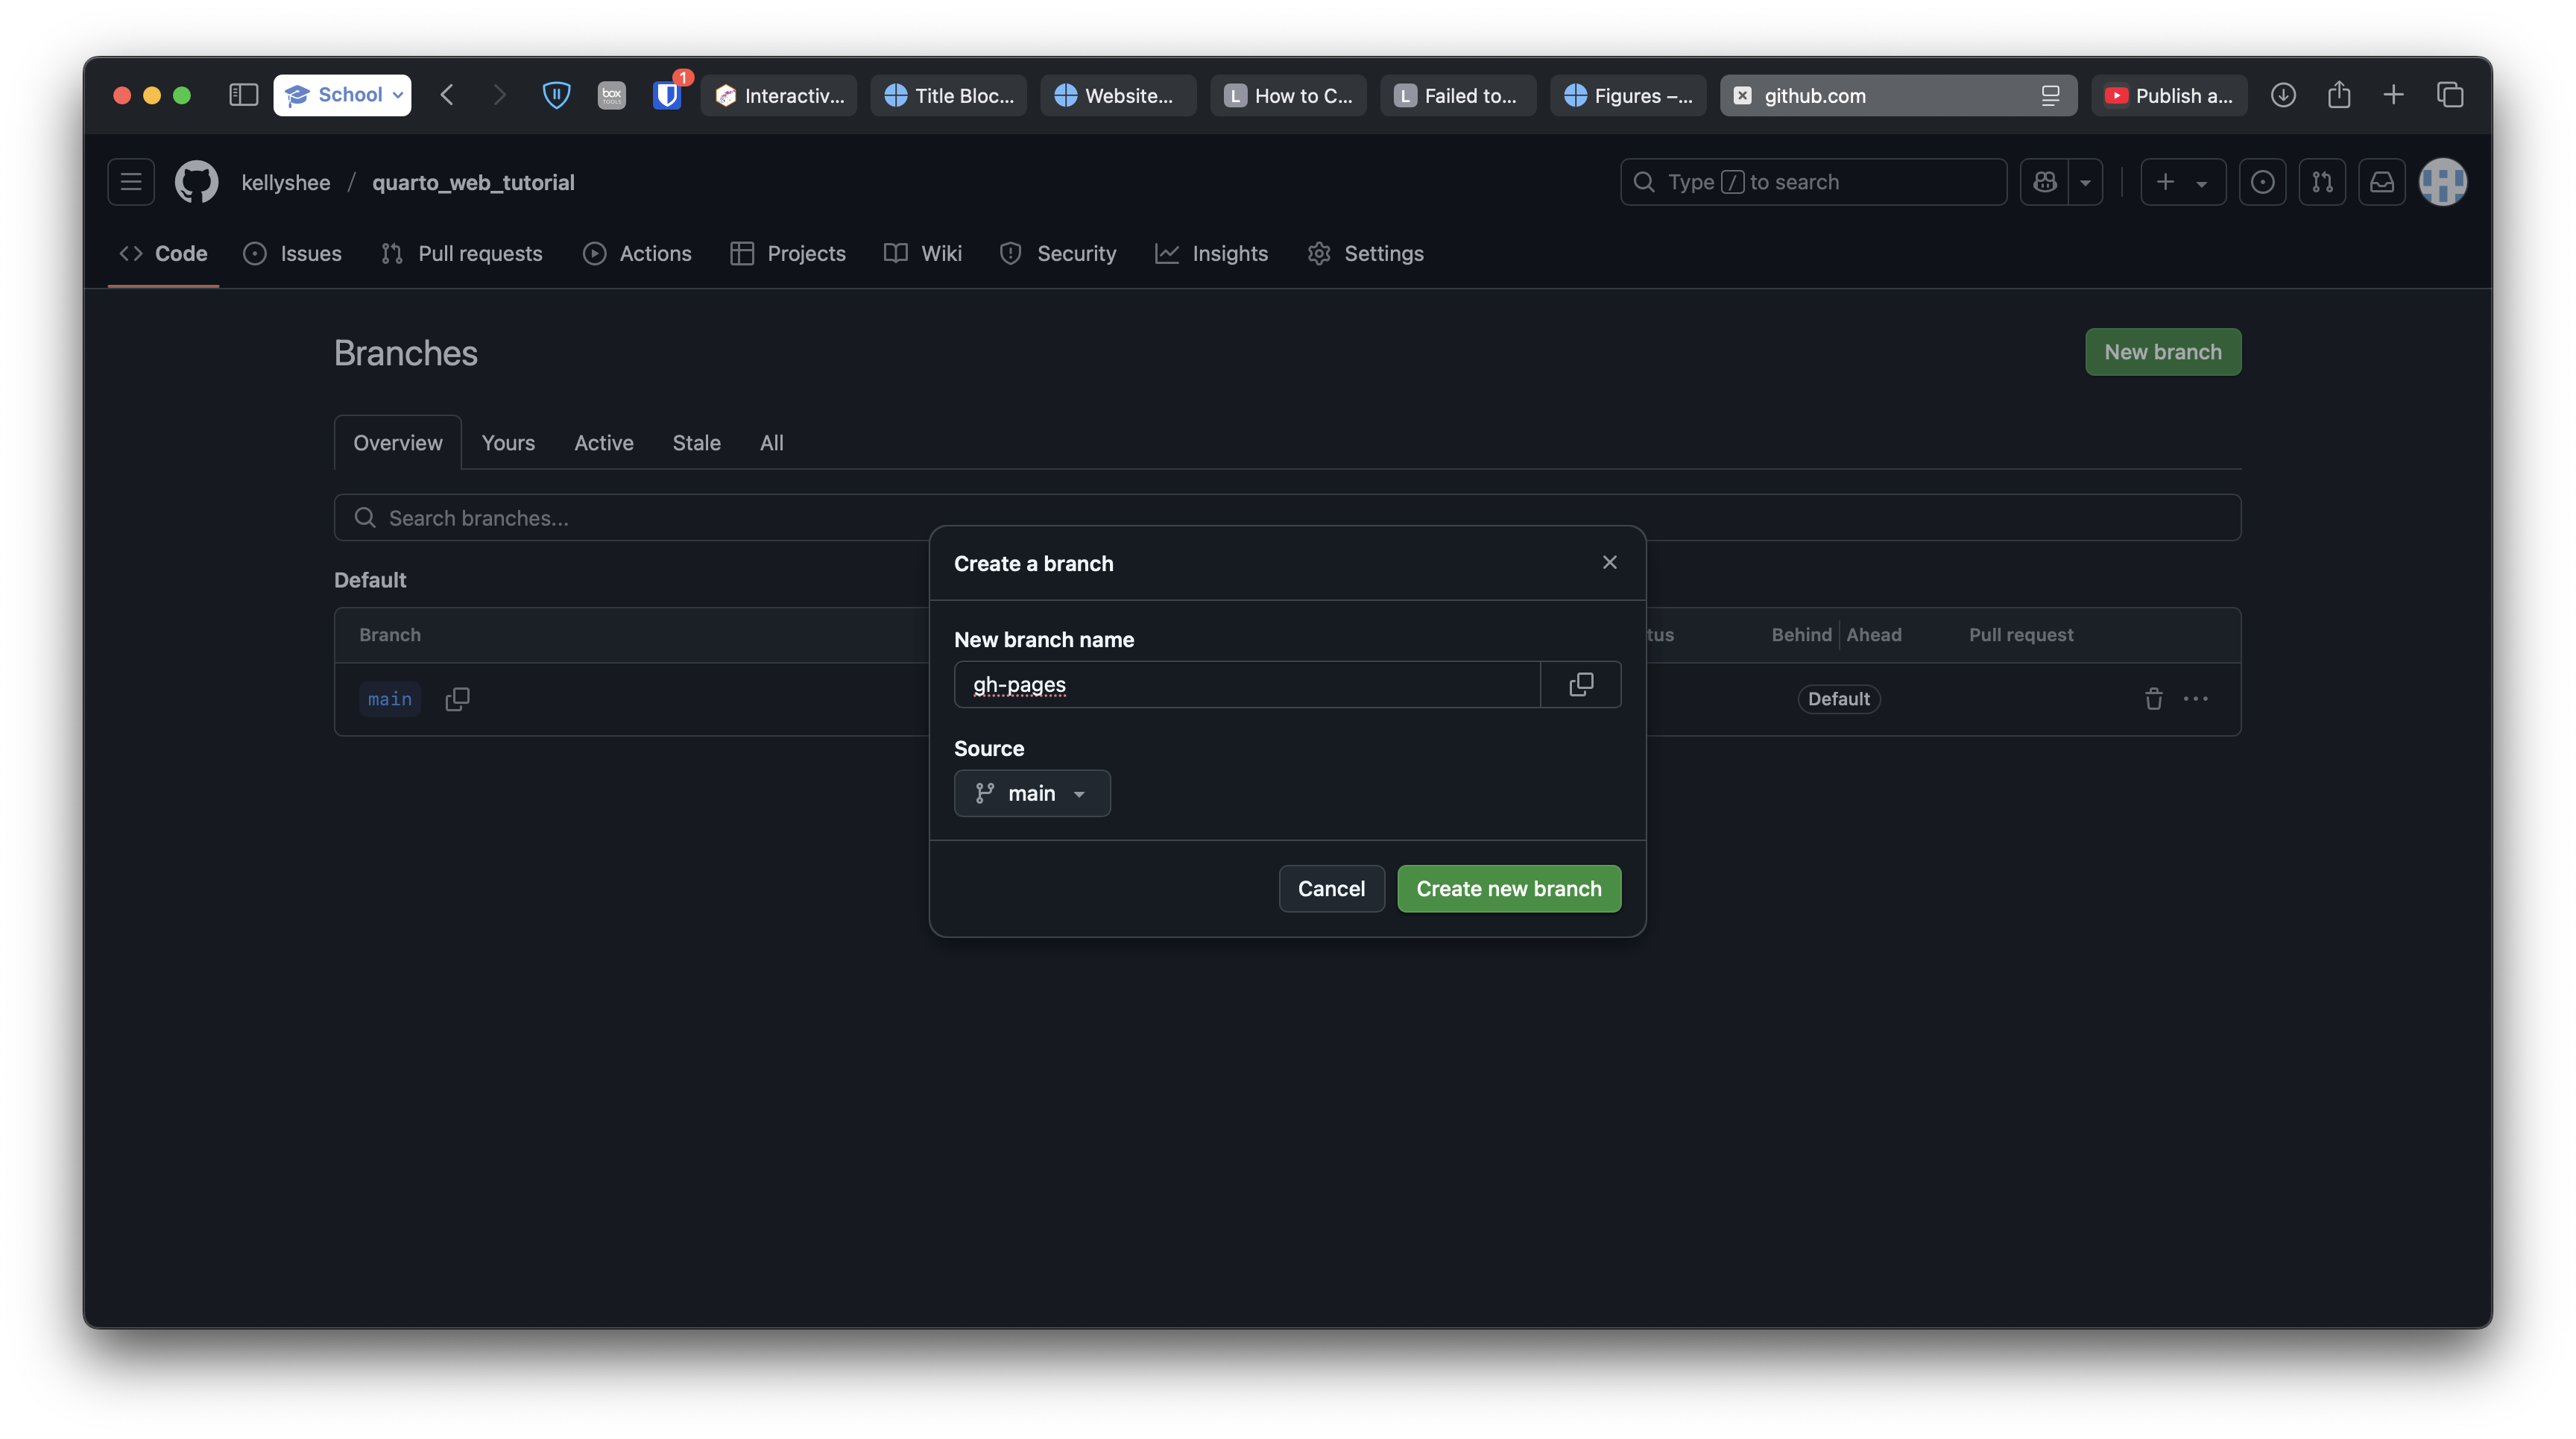
6 Create gh-pages branch
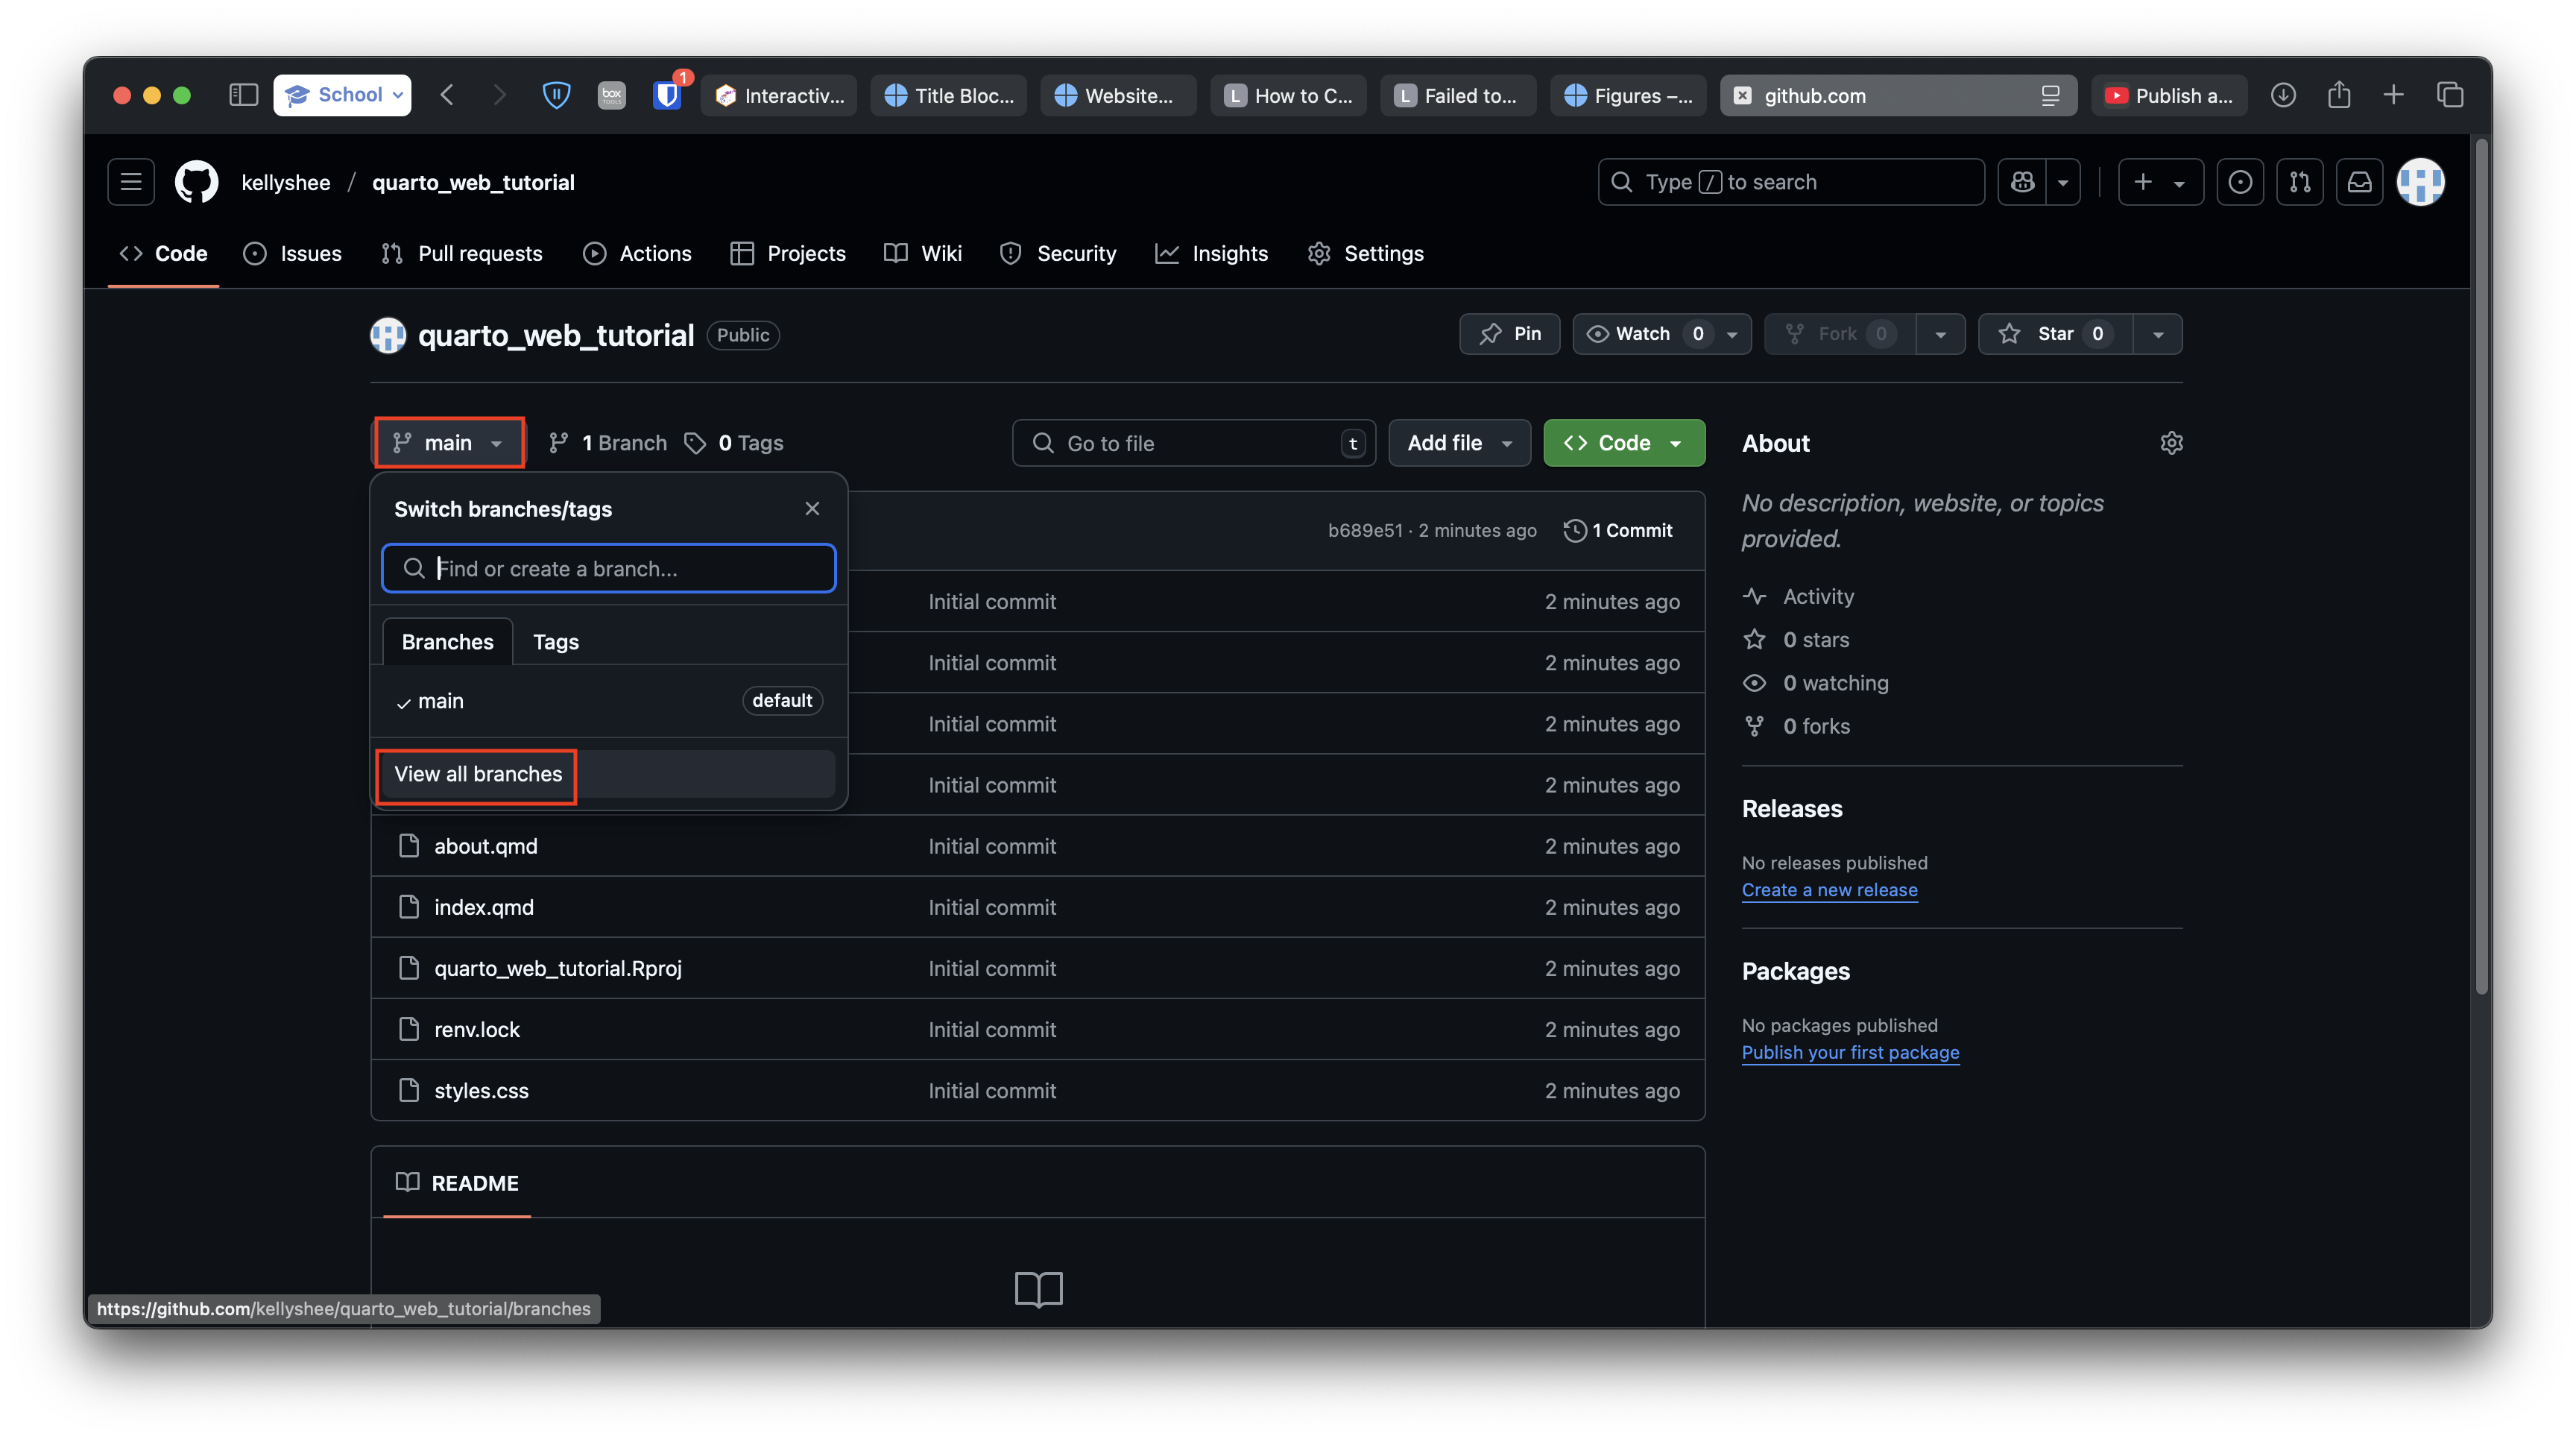
- On the same page, click the “main” branch button underneath the repository name.
- Click “View all branches.”
- Click “New branch” on the right side of the screen.
- Name and create a new branch called
gh-pages.
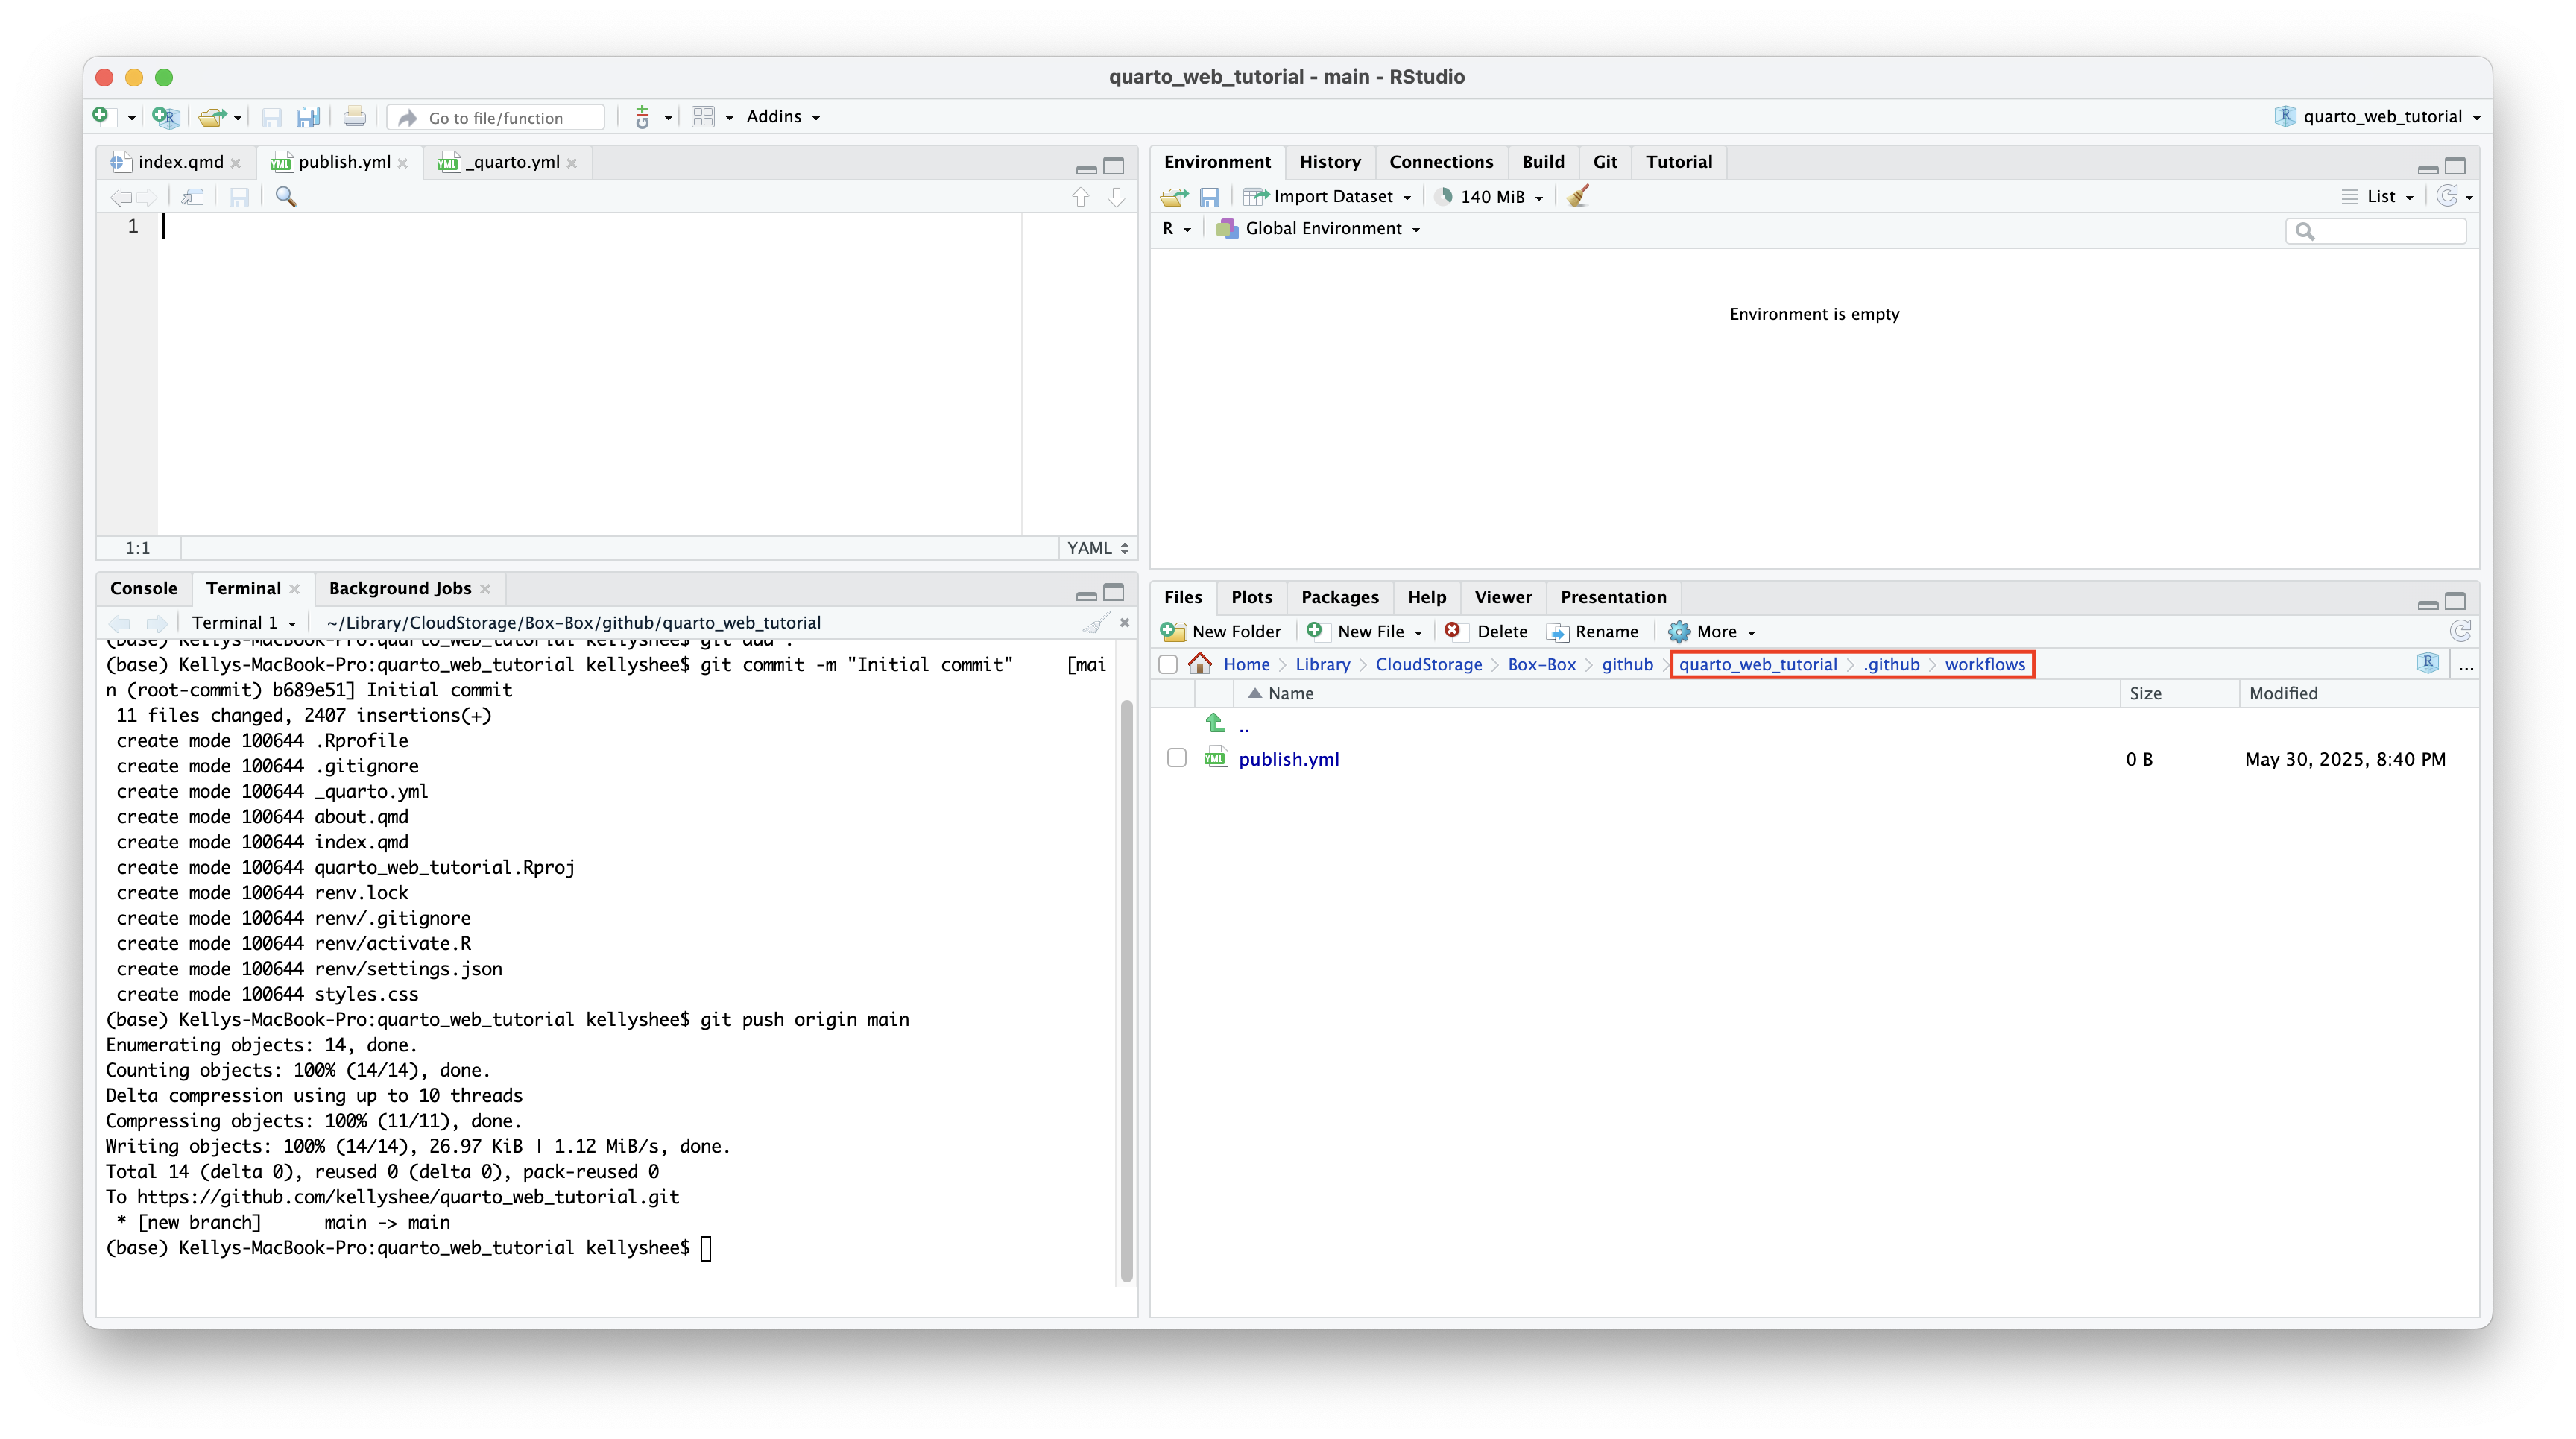
7 Create automation file
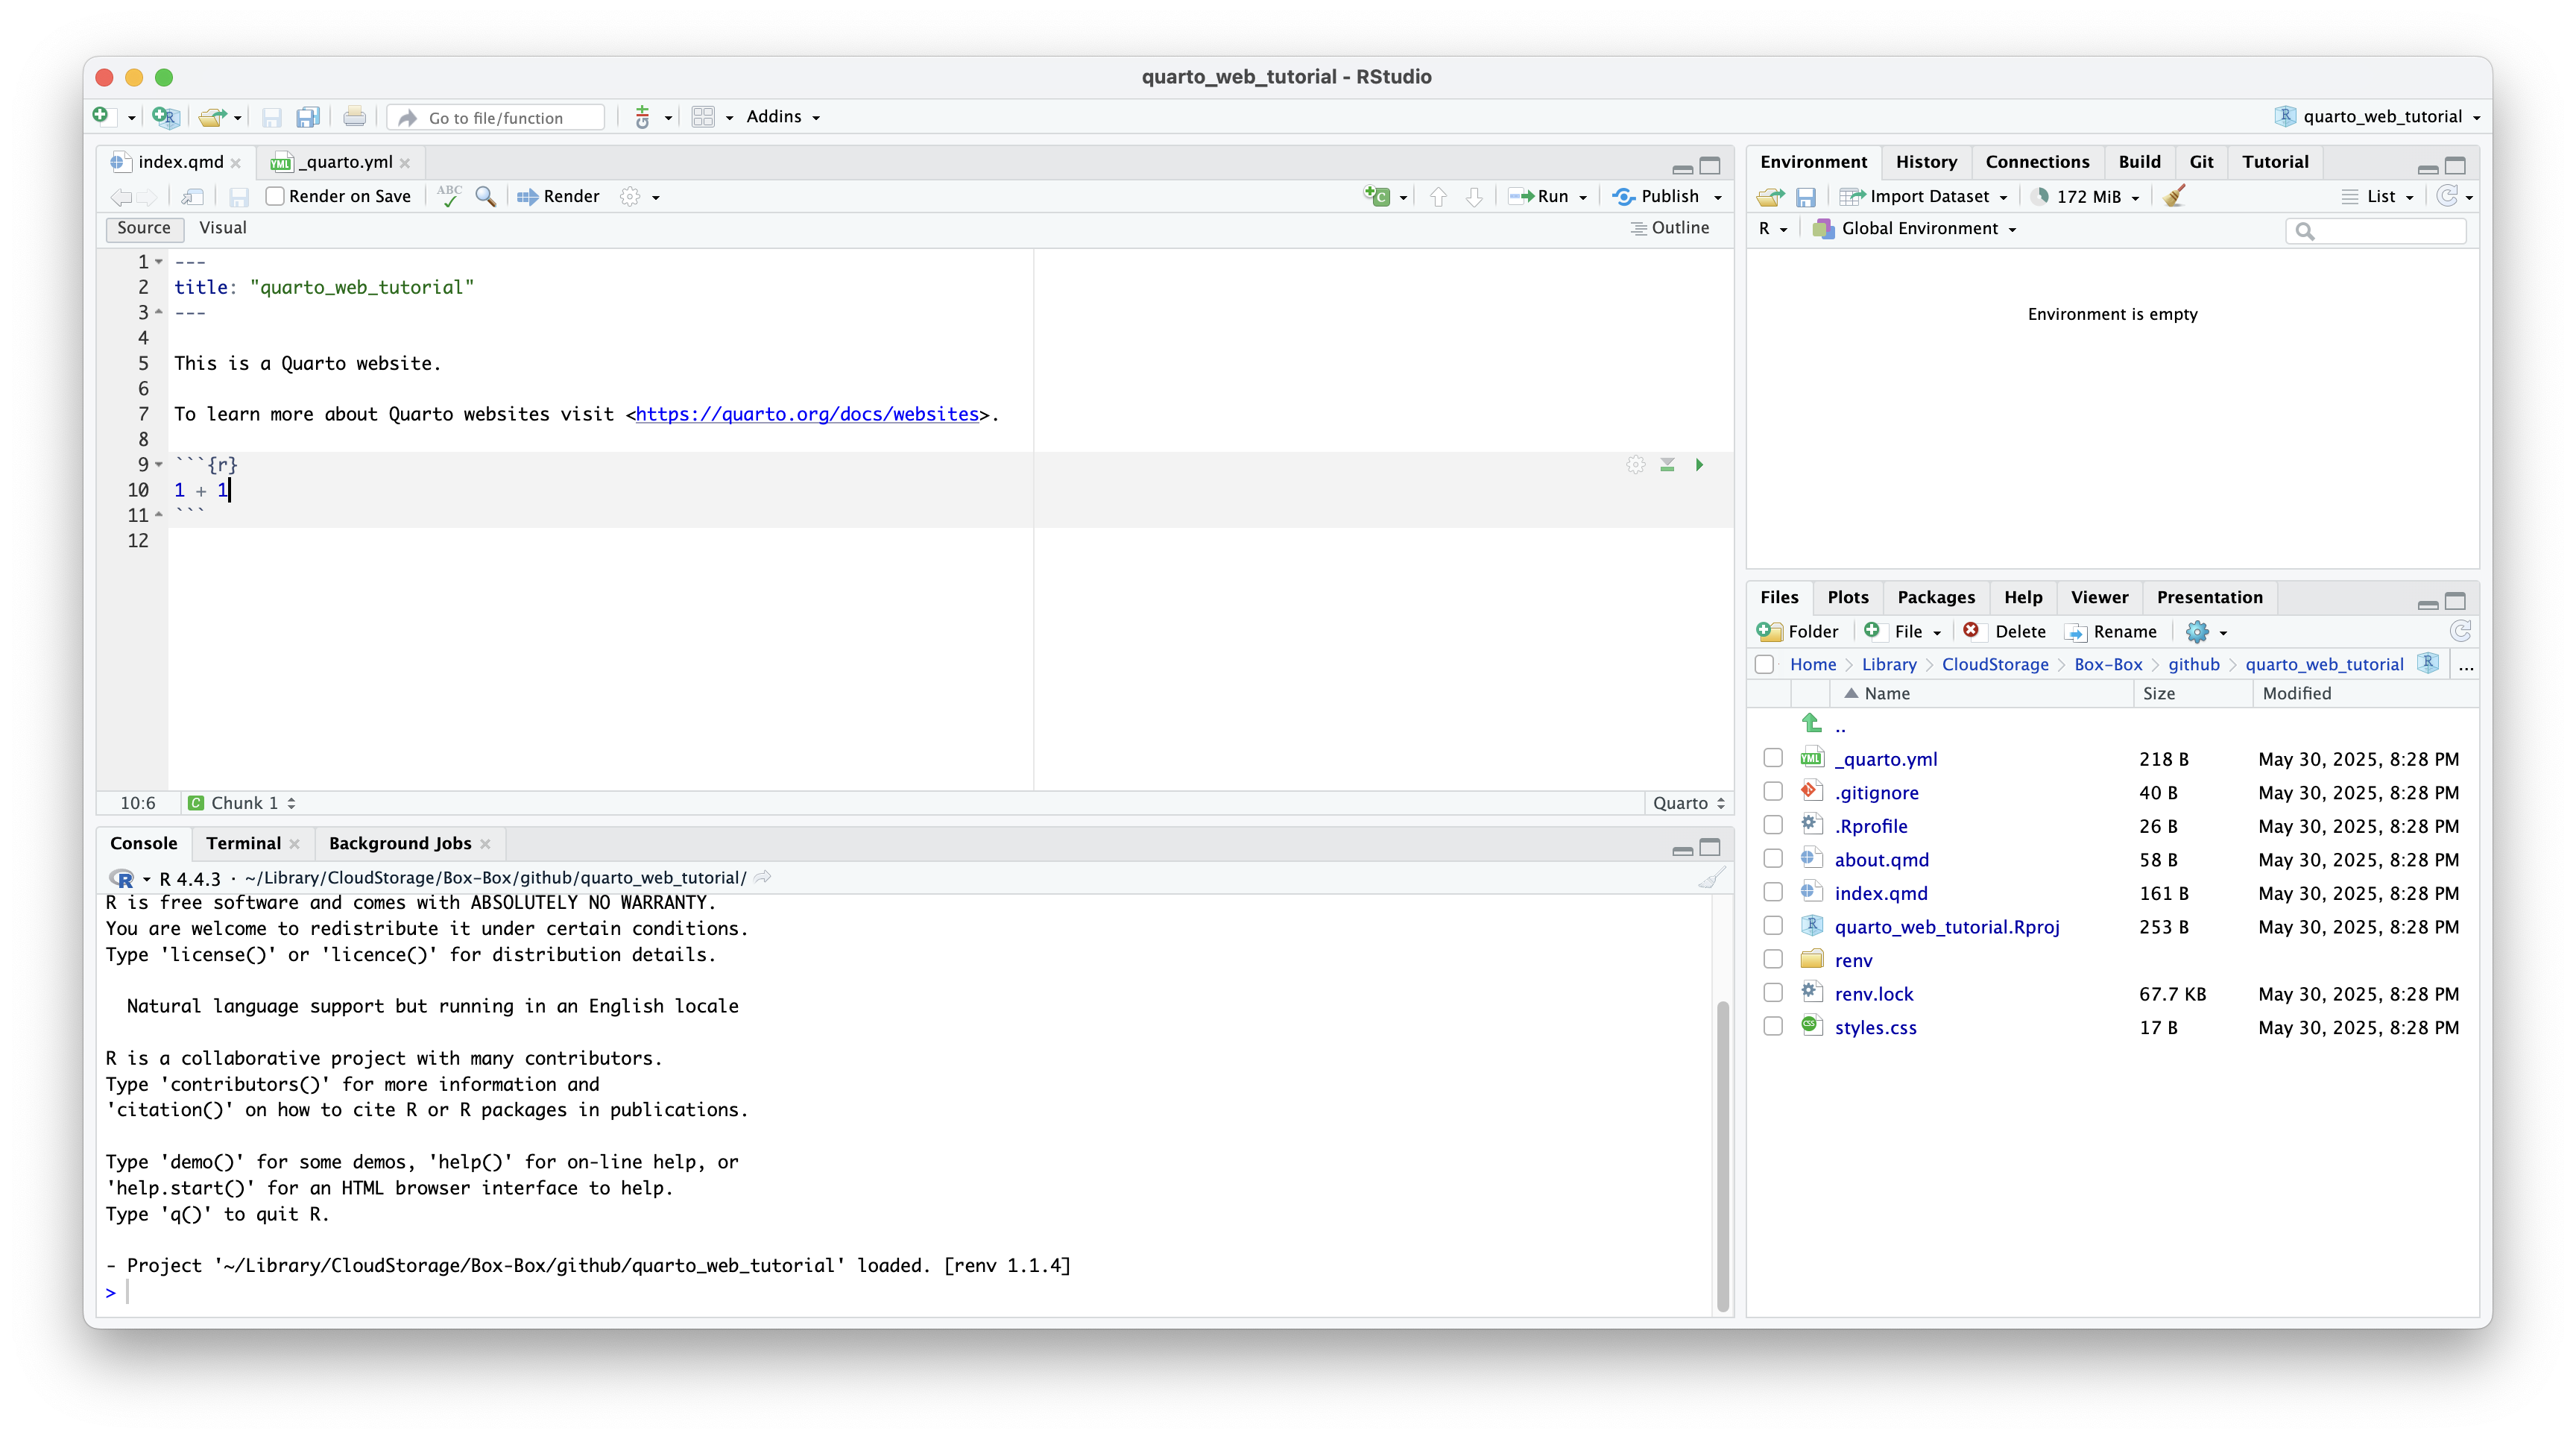
- Return to RStudio and navigate to the file tab in the output pane.
- Create a new folder named
.github - Inside the
.githubfolder, create another new folder namedworkflows - Inside the
workflowsfolder, create a text file namedpublish.yml.
The file path of publish.yml should be the following:
├── ...
  ├── kellyshee.github.io
    ├── kellyshee.github.io.Rproj
    ├── other files
    ├── .github
      ├── workflows
        ├── publish.yml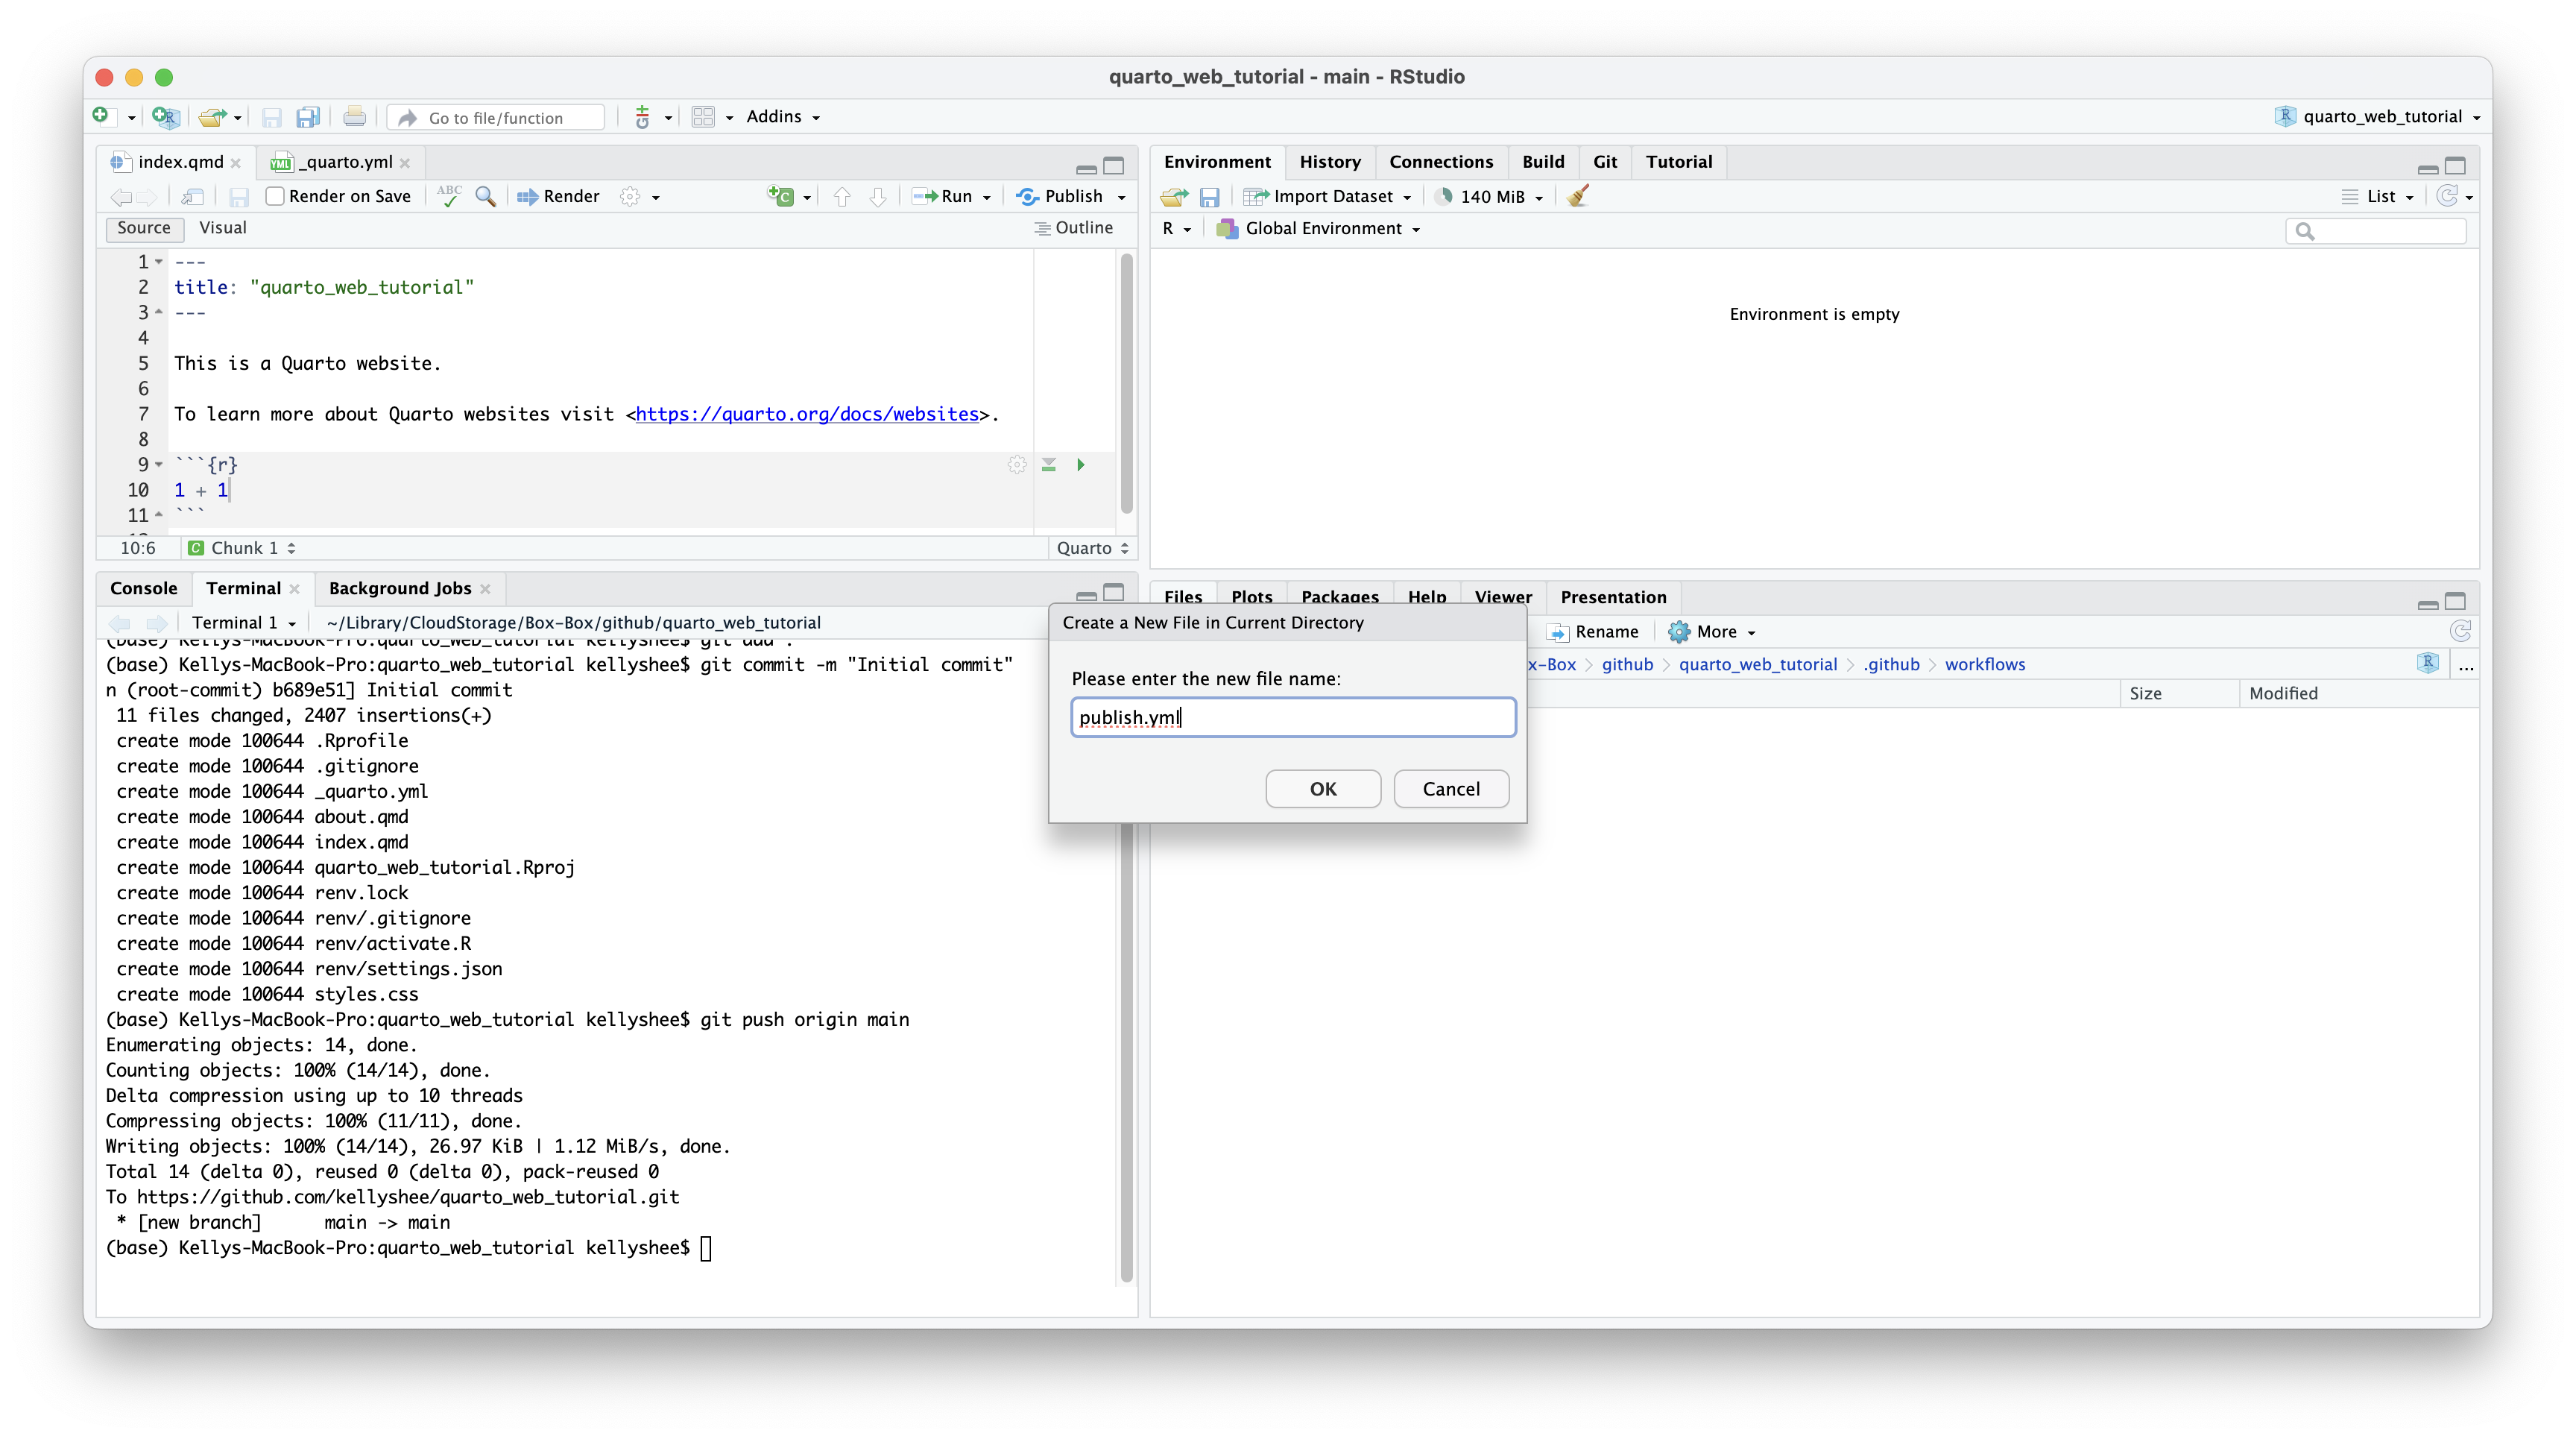
8 Copy and paste code into publish.yml
Paste the following code into publish.yml, then save the file.
.github/workflows/publish.yml
# Knitr with renv

on:
  workflow_dispatch:
  push:
    branches: main

name: Quarto Publish

jobs:
  build-deploy:
    runs-on: ubuntu-latest
    permissions:
      contents: write
    steps:
      - name: Check out repository
        uses: actions/checkout@v4

      - name: Set up Quarto
        uses: quarto-dev/quarto-actions/setup@v2

      - name: Install R
        uses: r-lib/actions/setup-r@v2
        with:
          r-version: '4.2.0'

      - name: Install R Dependencies
        uses: r-lib/actions/setup-renv@v2
        with:
          cache-version: 1

      - name: Render and Publish
        uses: quarto-dev/quarto-actions/publish@v2
        with:
          target: gh-pages
        env:
          GITHUB_TOKEN: ${{ secrets.GITHUB_TOKEN }}
9 Push publish.yml to repo
- Return to the terminal tab in the console pane.
- Copy and paste the following commands line by line into the terminal. Output will appear.
Terminal
git add .
git commit -m "Add publish.yml to automate publishing of site"
git push origin main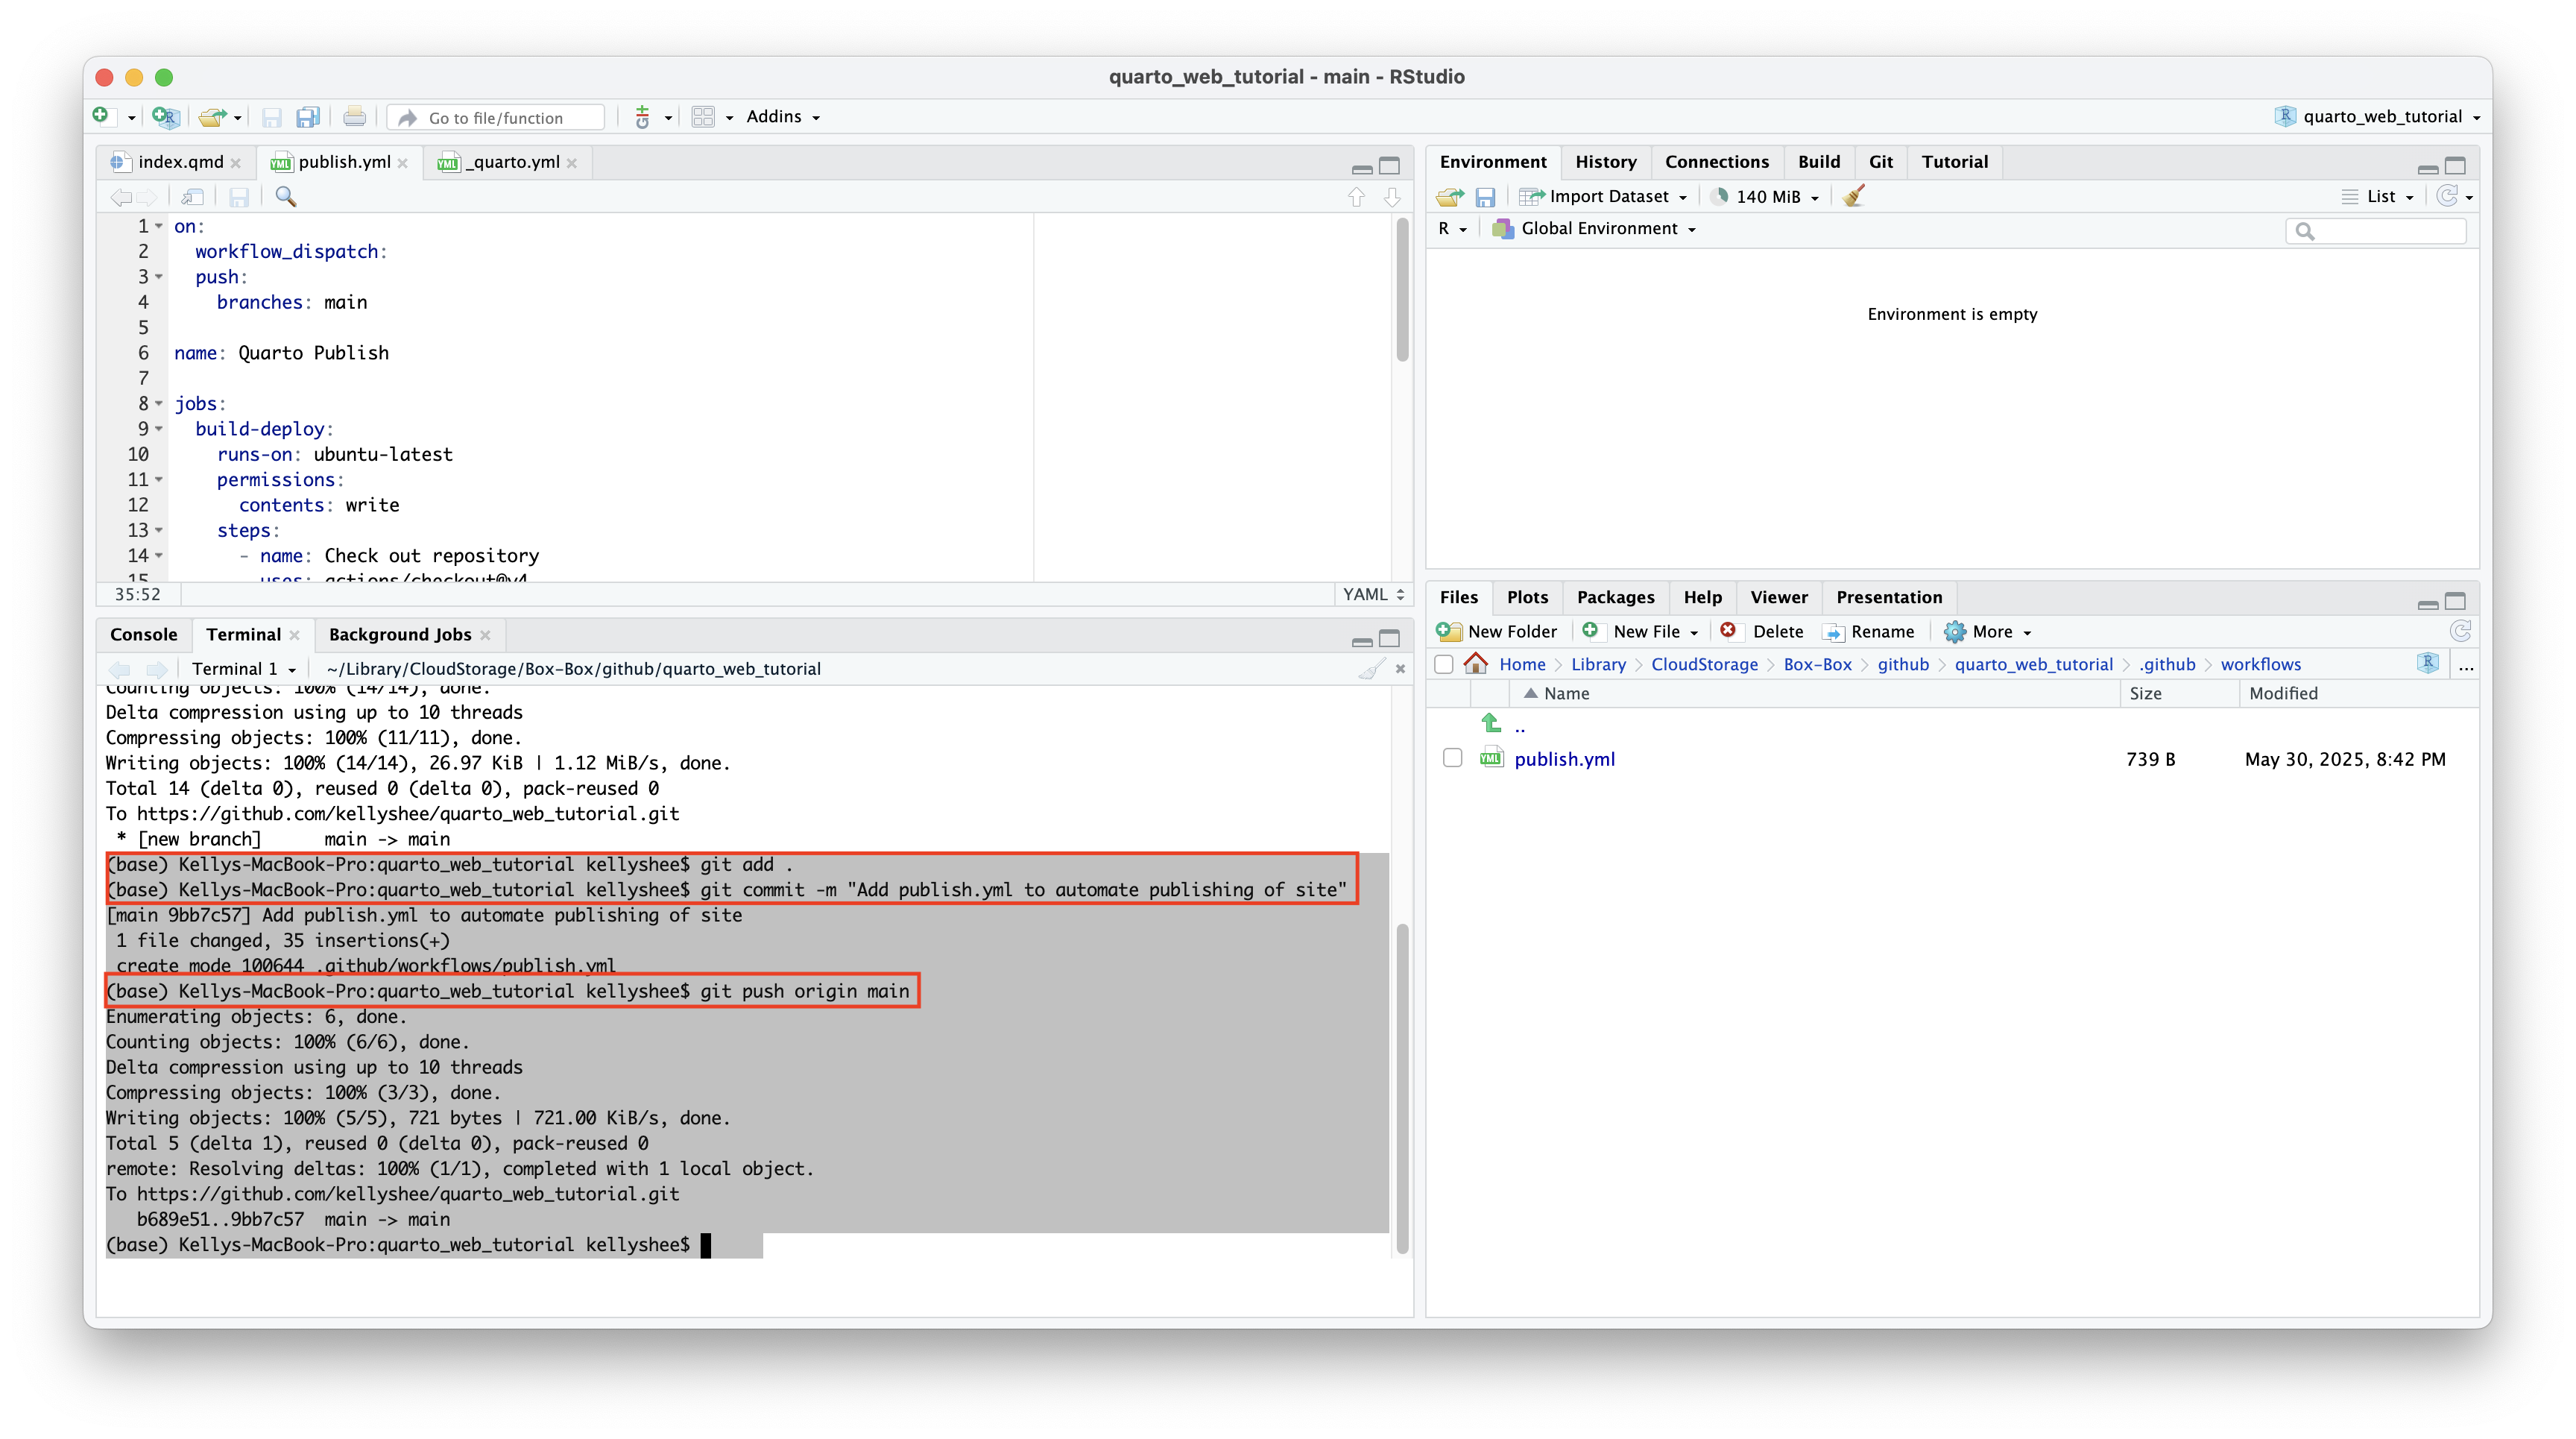
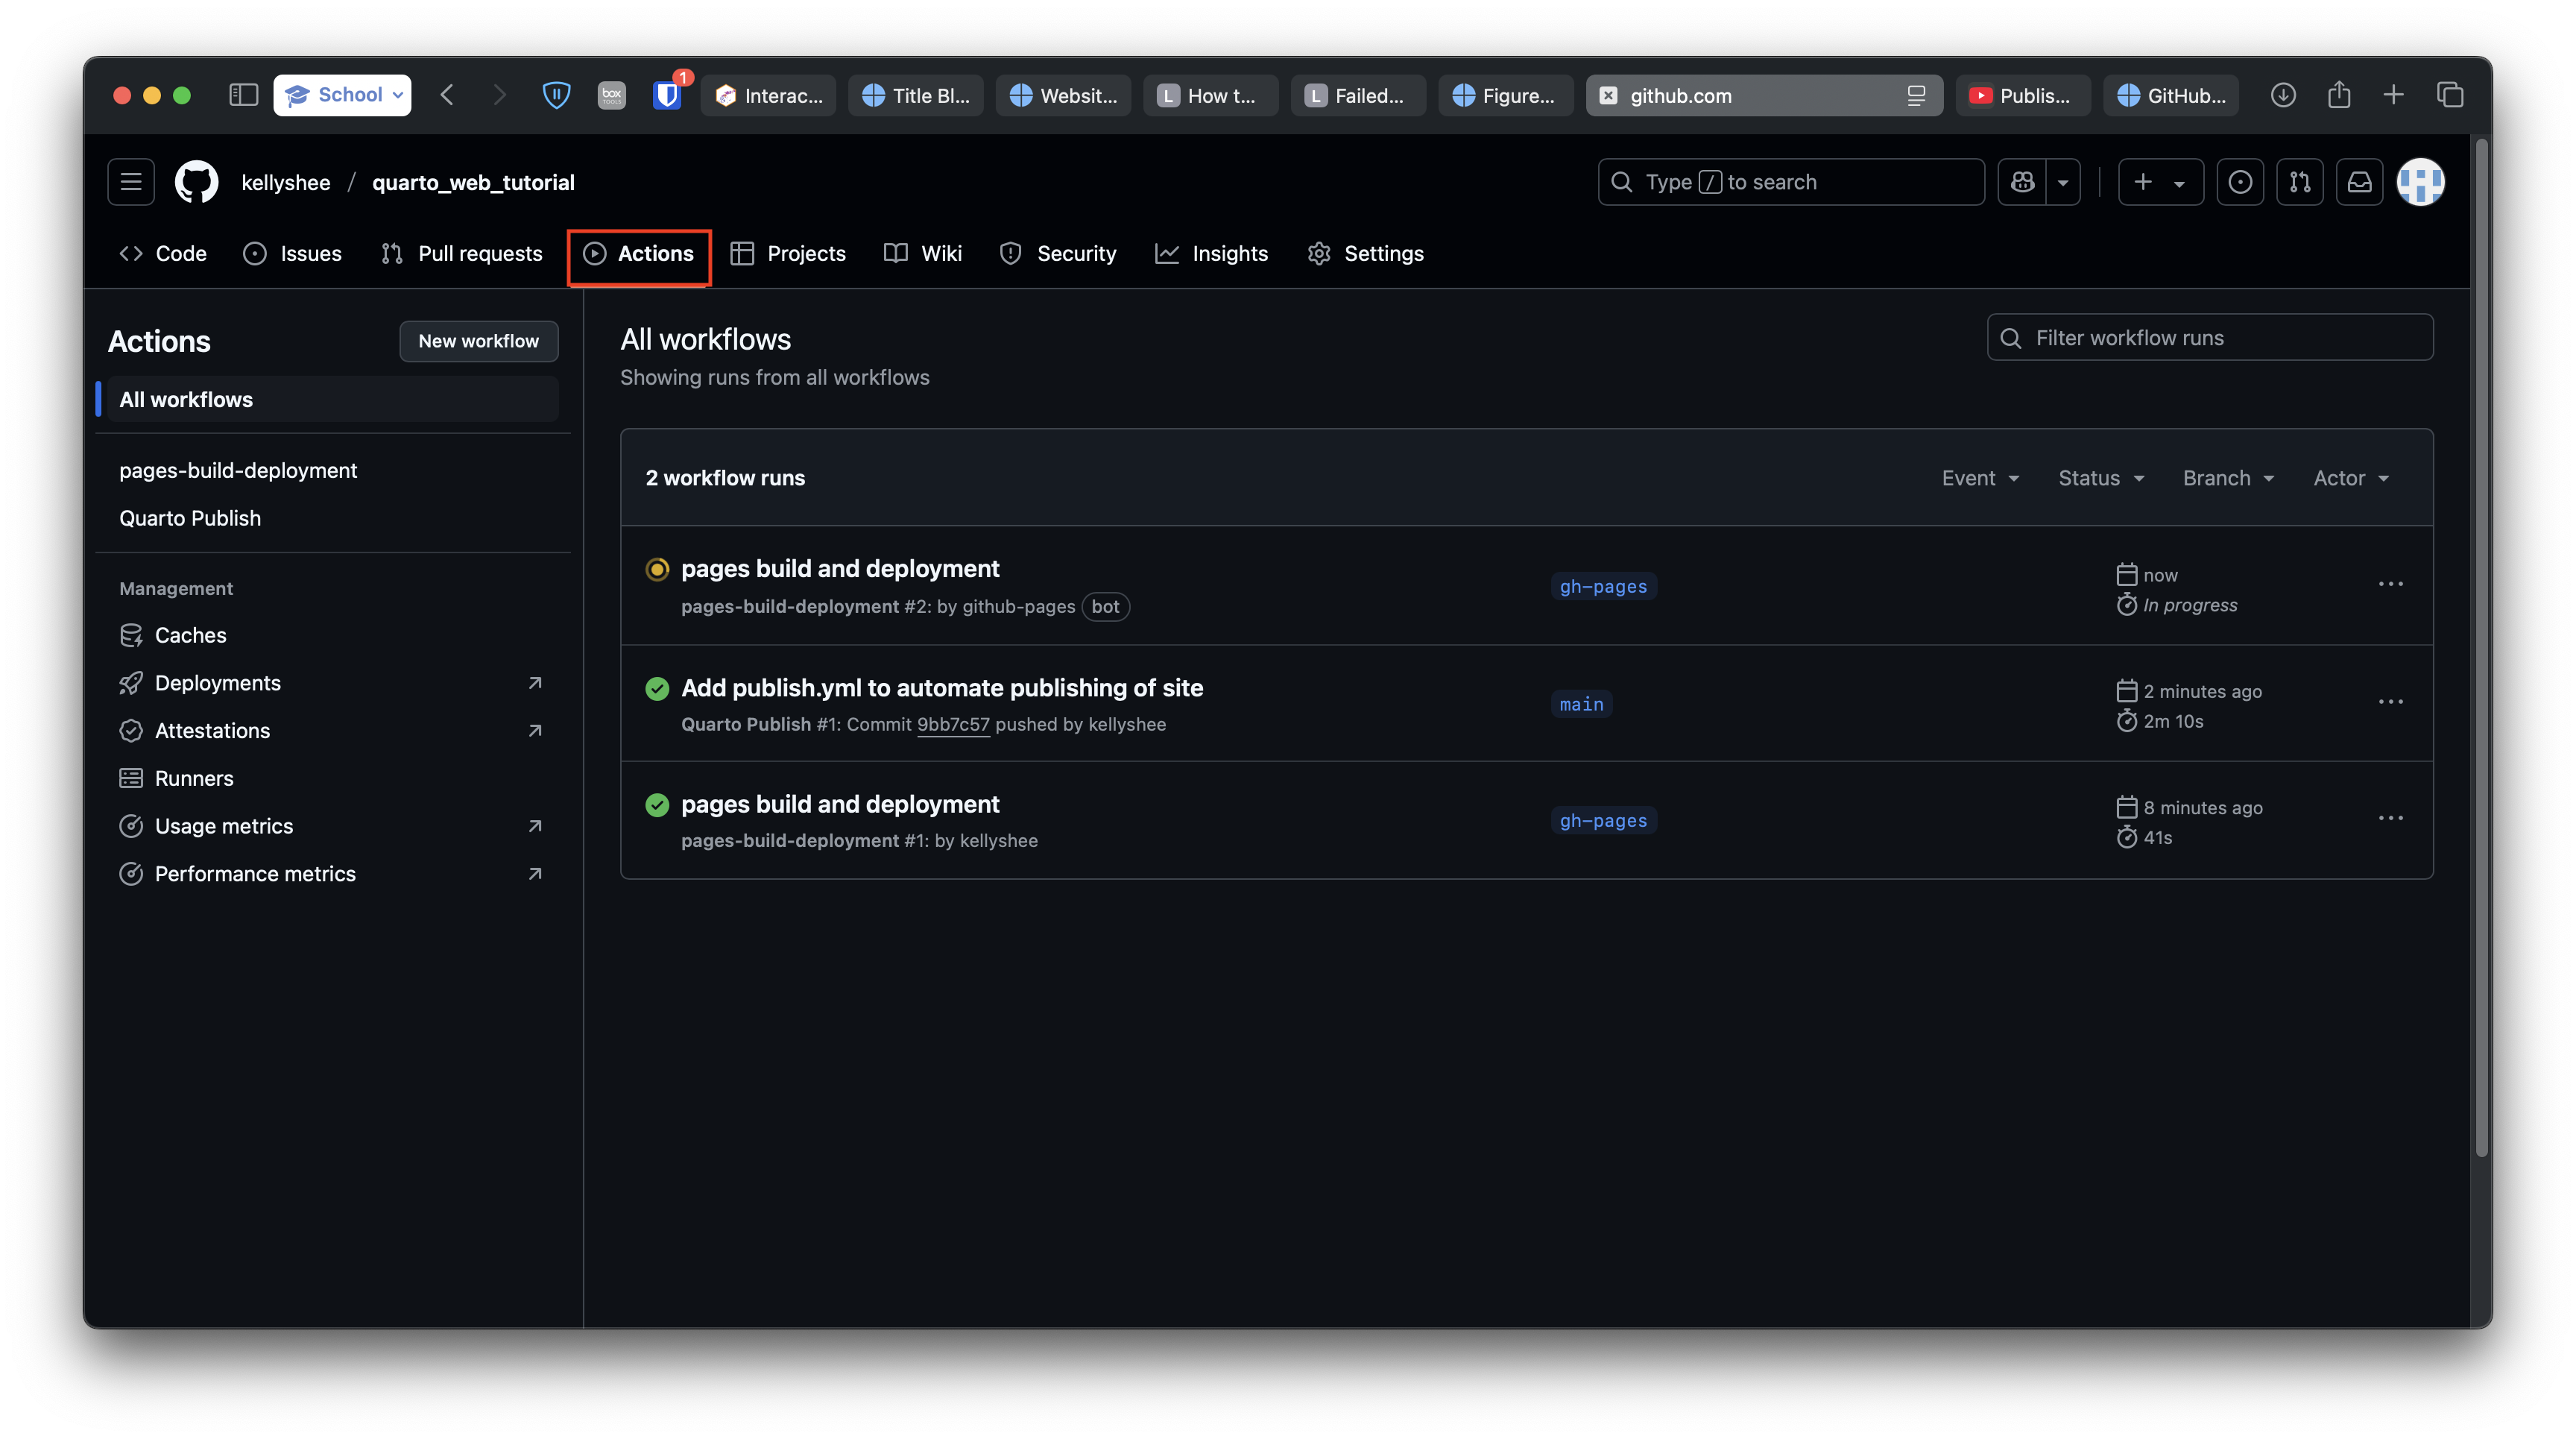
10 Check repo settings
- Return to GitHub.
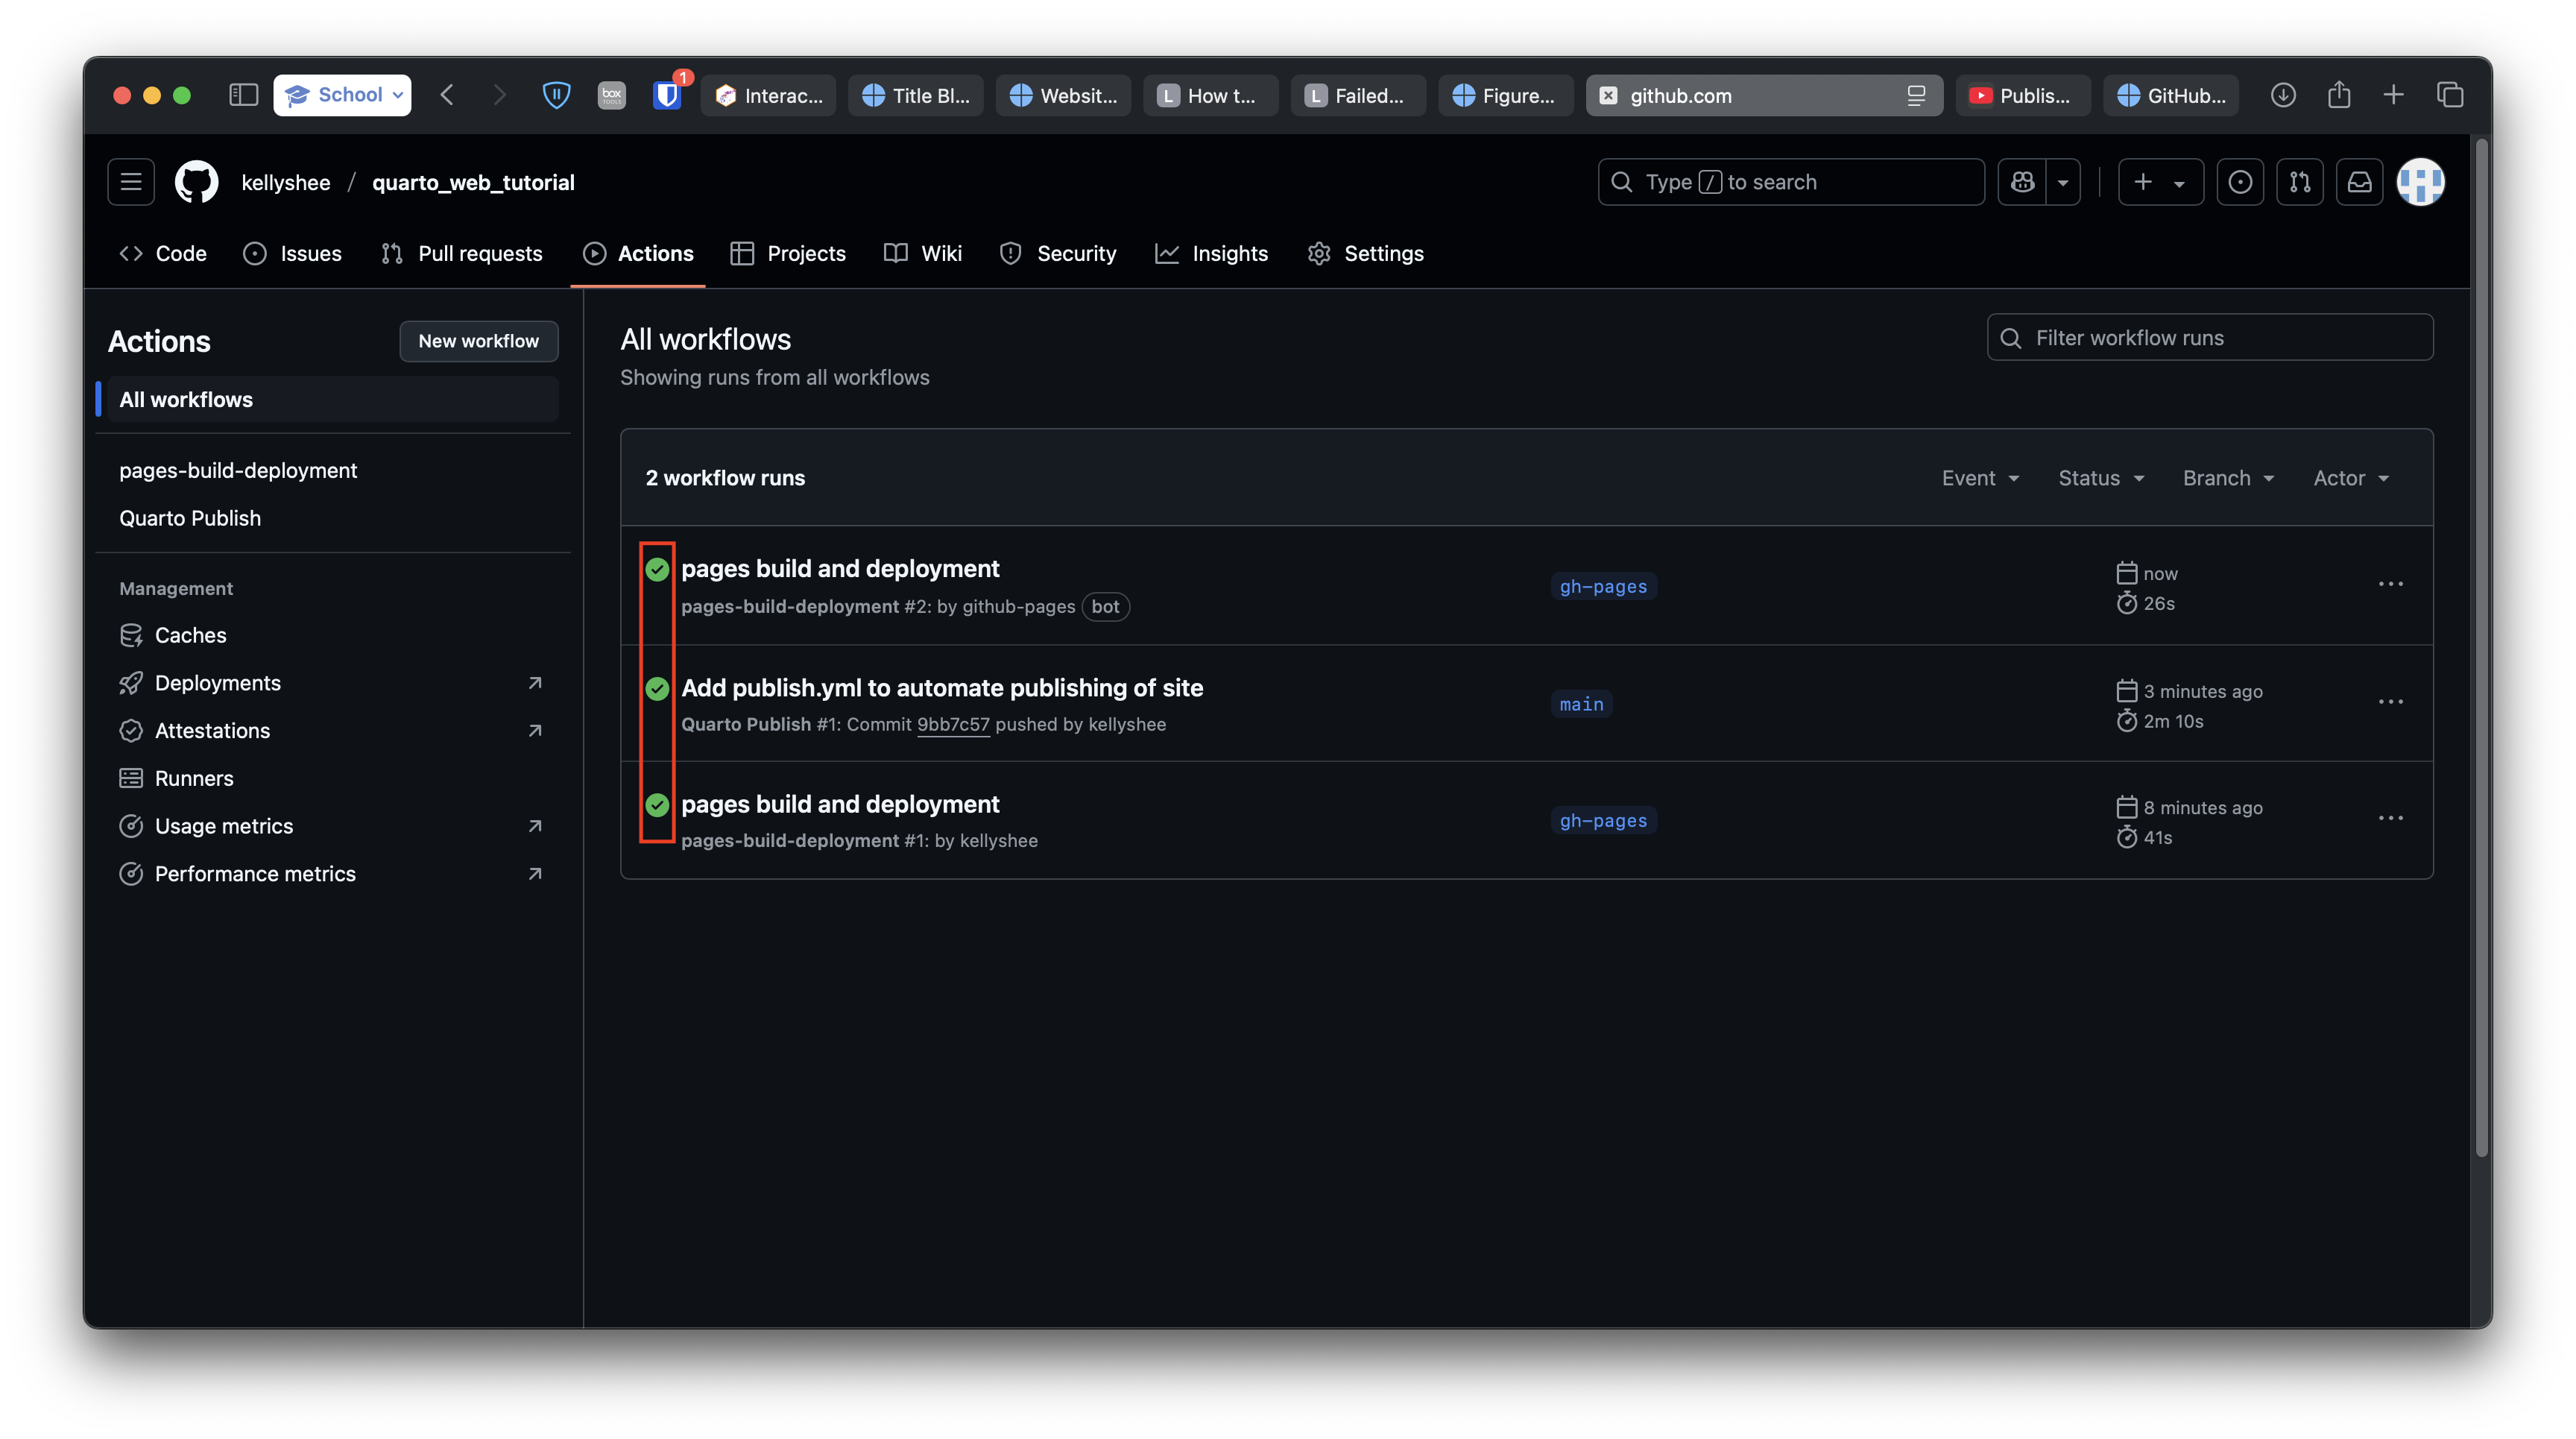
- Click on the Actions tab. Wait until all actions are green.
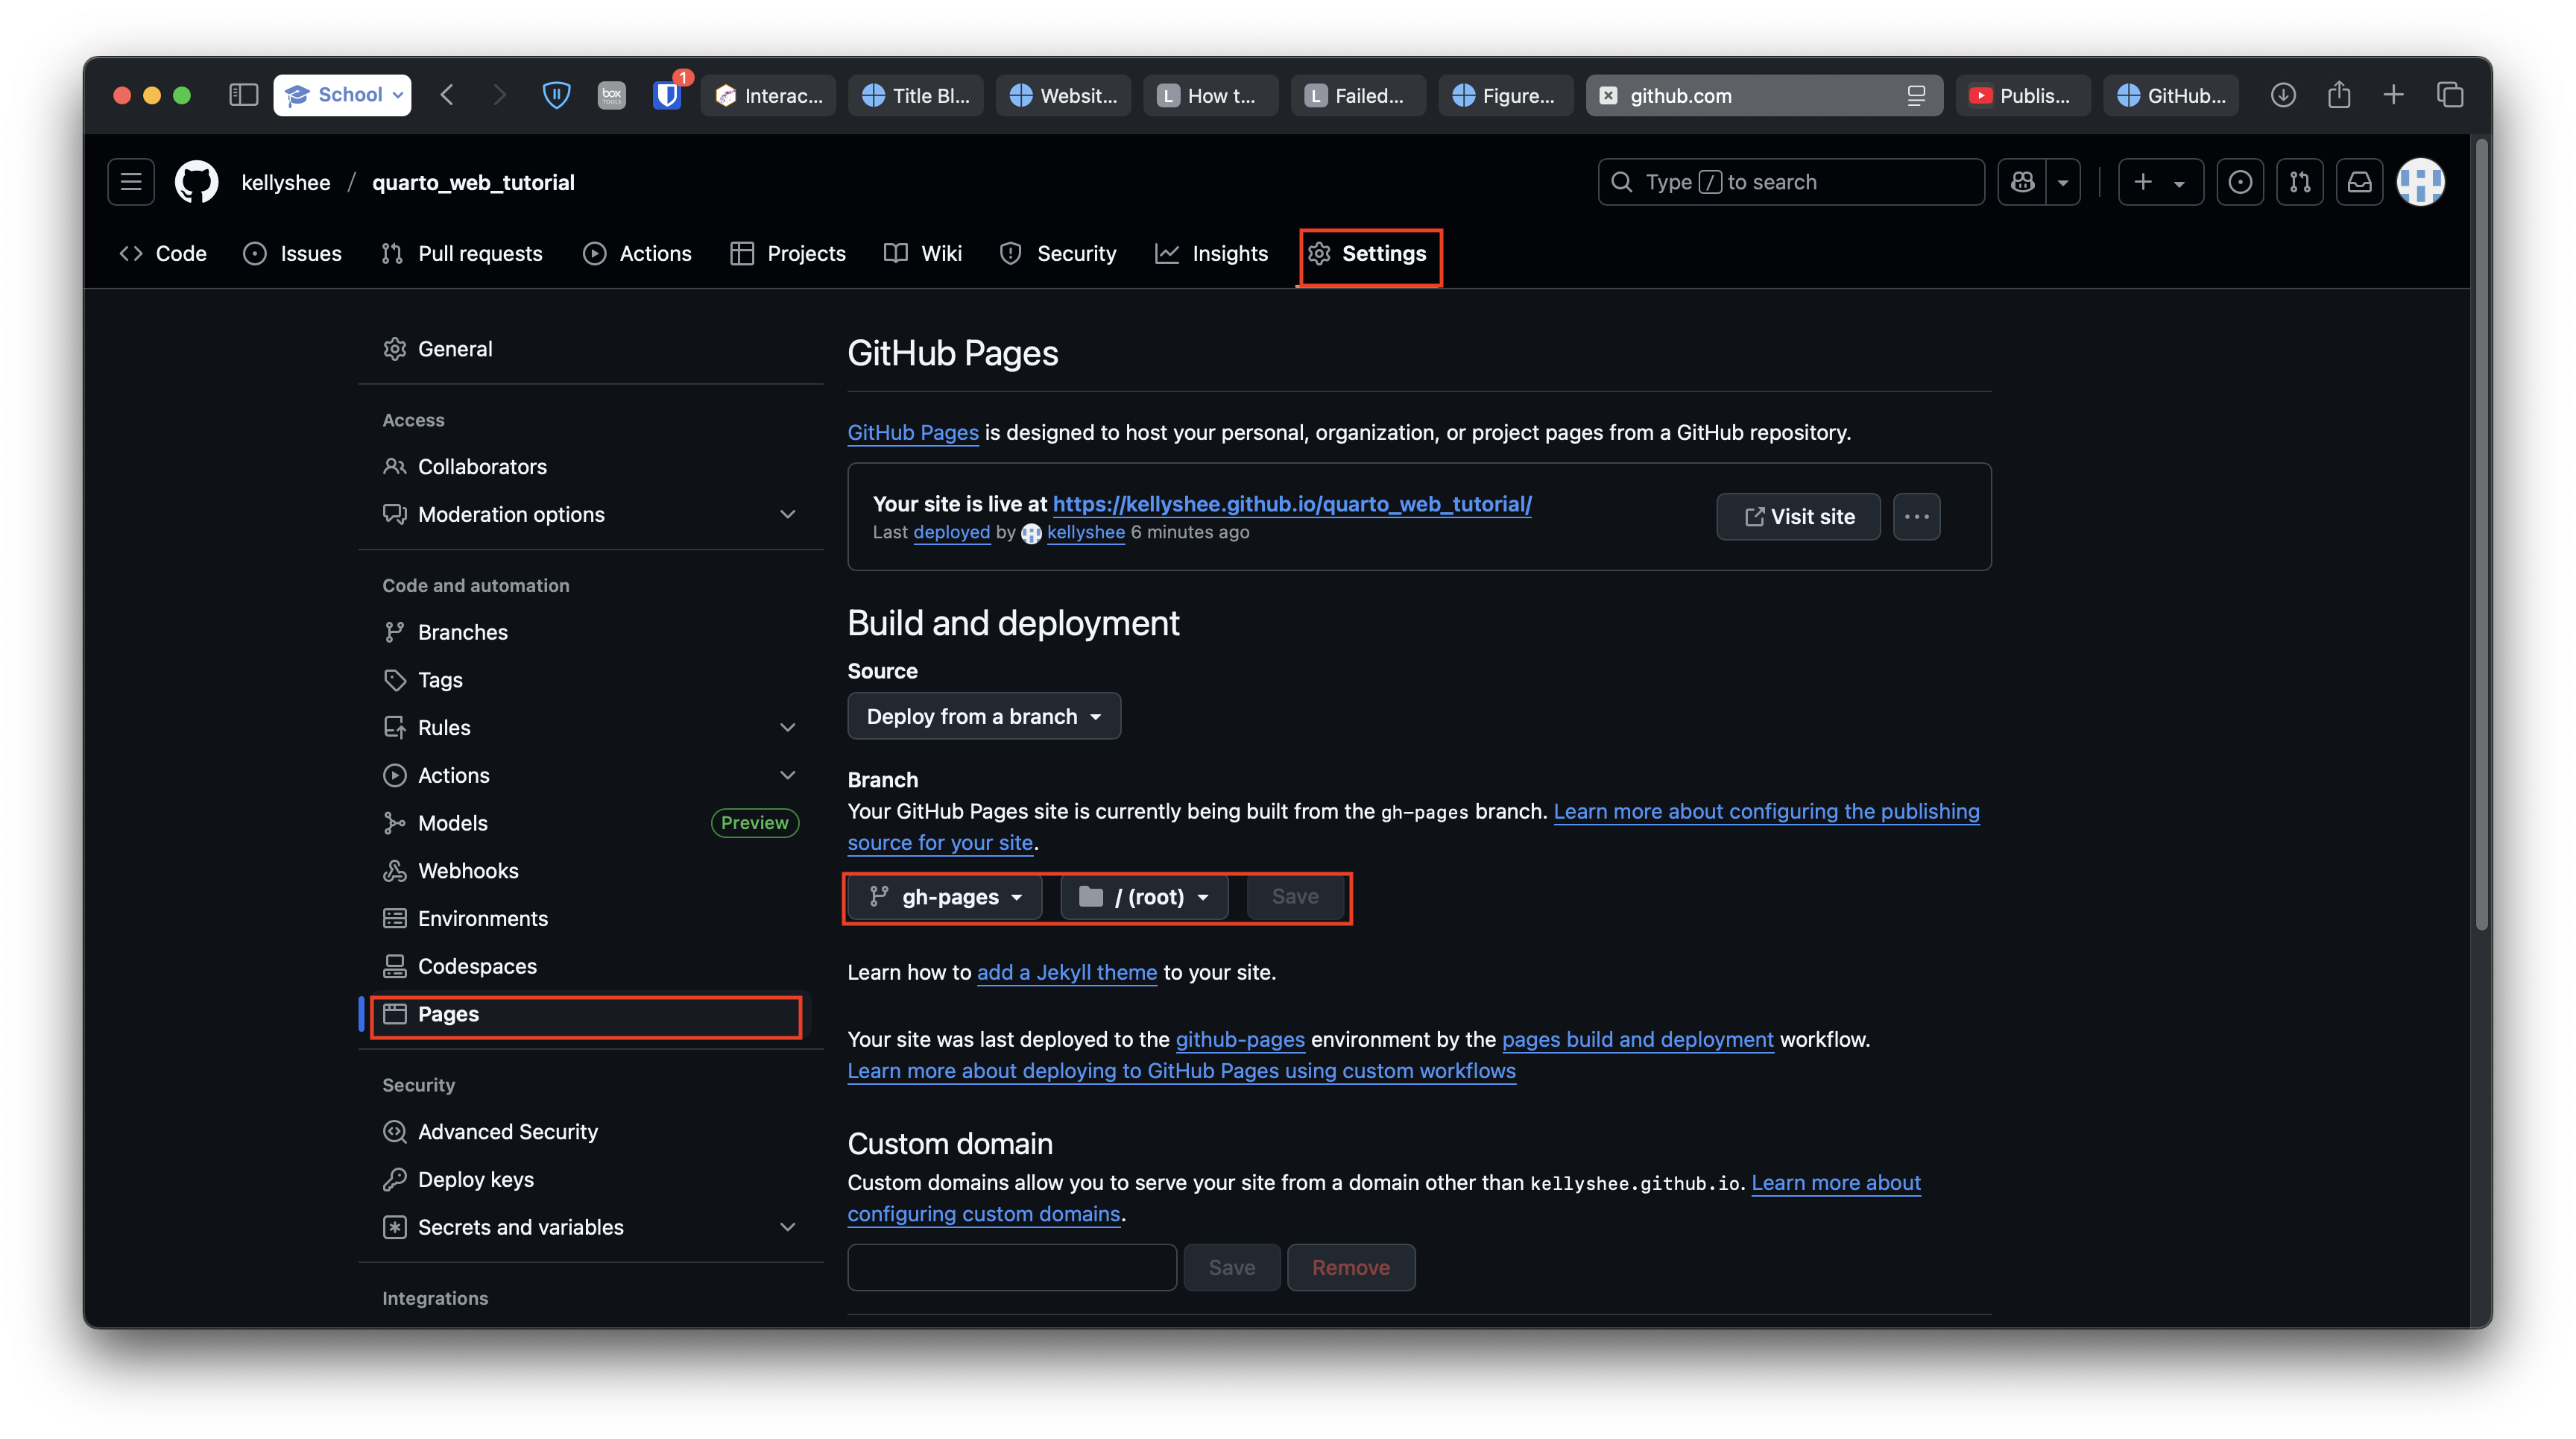
- Click on the “Settings” tab. Look at the side column and click “Pages.” Ensure that your GitHub Pages site is built from the
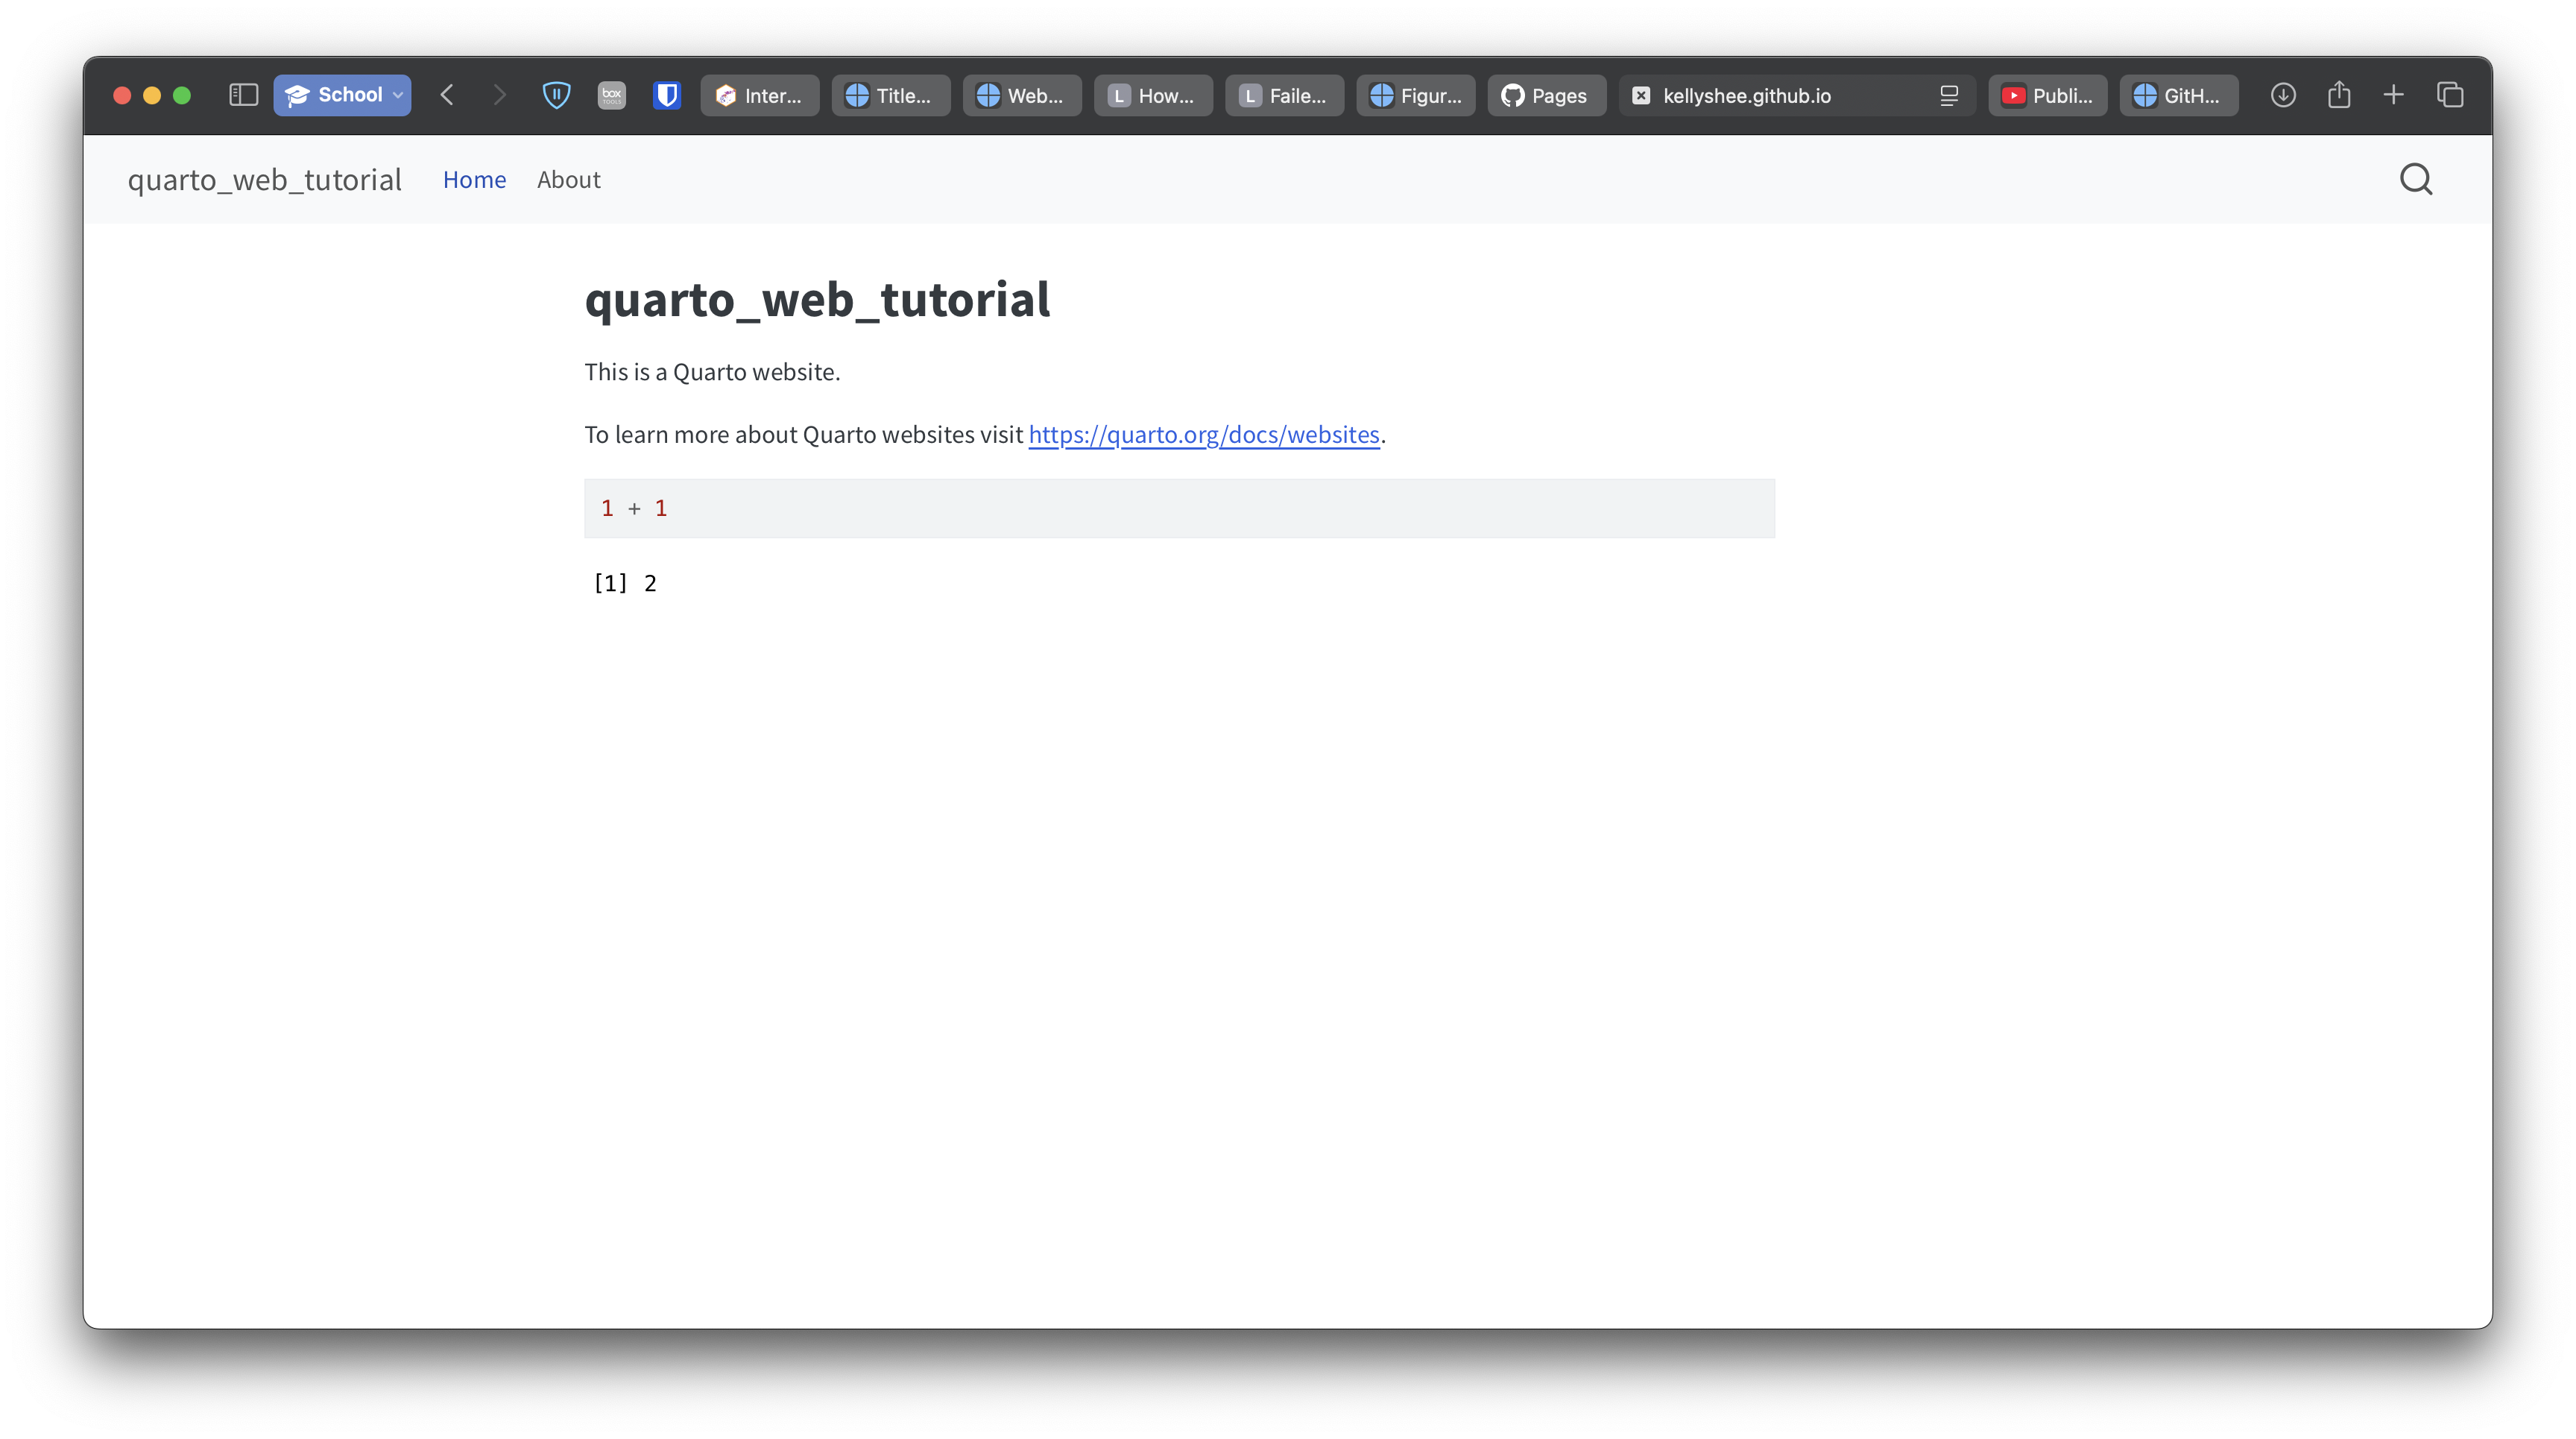
gh-pagesbranch. - Click “Visit site” at the top of the page. Whenever you edit this site in RStudio, you can use the three Git commands to publish it automatically. It’ll take a couple minutes for the site to change.
11 Credit
I learned this from a video by Melissa Van Bussel. My tutorial differs from hers in that I use RStudio’s terminal instead of a Windows terminal with zsh.
Motivation
I frequently forget the things I’ve learned, and it’s annoying having to dig through paper notebooks. Obsidian, Notion, and other software are additionally annoying because I keep overfixating on settings.
You know what isn’t so terrible? RStudio (it helps that I’ve been acquainted with it since 2018). It’s nice having your own website to reference while also doubling as your portfolio. So, if you’re like me, create your own website!